 OK, I’ll admit it: every time I see a display of free AOL CDs, I pick one up and wonder what I could do with it. This week, I decided that the latest offering at my local Target store would make an ideal card, so I decided to take it apart and use it as a template.
If you’re following along, here’s what you’ll need to make your own version of this card:
- An AOL folder – Mine was four panels wide, with a CD pocket on the last panel. This same technique can be used with pretty much anything AOL produces.
- Two pieces of 8-1/2 x 11 cardstock
- A pencil
- Scissors
- Rubber stamps, ink pads and collage goodies
- A glue stick
- A CD – I generally don’t use AOL CDs to alter, because they have too much stuff printed on them. I use old blank CDs instead.
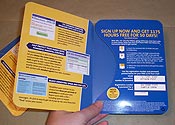
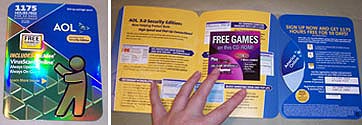 This is what my AOL folder looked like when I grabbed it. Three panels, with a fourth folded back to create the CD pocket on the right end.
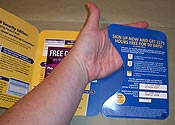
 The first thing I did was remove the CD, and gently detach the glued sections of the fourth panel, to fold the CD holder out flat.
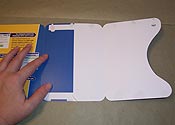
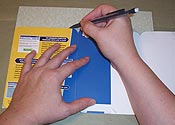
 Next, I cut off one panel of the folder. My card is just going to flip open to reveal the CD pocket—I don’t need that extra panel.
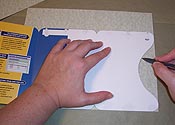 I traced around the template on two pieces of cardstock. On the first piece, I traced the left and center panels. On the second piece, I traced the center panel again, plus the right, curved CD holder panel. This means I traced the center panel twice. I cut out the two pieces of cardstock, ignoring the corner curves for the moment. Then I folded them to mimic the folds in my template.
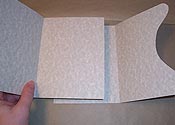 Here are my two pieces, cut and ready to be glued. The two center panels are going to completely overlap. I did this to provide extra support for the CD (and also to make this fit gracefully on two pieces of cardstock). I glued them together, using a glue stick.
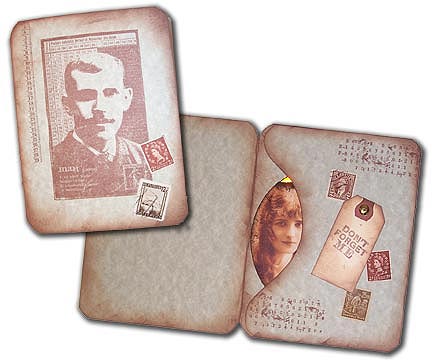
Now for the decoration! First, I edged the whole folder, inside and out, with Chestnut Roan chalk ink. Then I stamped the front with a handful of Ink & the Dog stamps and dark brown dye ink, and accented with a couple of postage stamps. Inside, I decorated the CD flap with stamps, and a tag attached with a brad. Here’s a tip: I covered the back side of the brad with a small piece of masking tape after attaching the tag, to protect my CD. The CD was decorated by simply glueing a vintage image print on one side, and patting with some brown inks.
Once all this had dried, I glued the CD flap in place. I did this by drawing a line of glue stick at the top and bottom of the flap, positioning the CD, and then folding the flap over it. I did this so there would be a little give, allowing the CD to slide in and out. Gluing it flat will make it a tight squeeze to get the CD back in.


