 A few months back, I stumbled upon some little board books at Michaels, and bought an armload of them, thinking they’d make great quick projects. I’ve used a couple of them for show samples, and they’ve all bascially taken the same form: shaker box on the exterior, niche on the interior, all based on a specific theme. I finally got my camera going as I assembled one.
To make your own little board book, you’ll need:
- A small board book with a pre-cut niche – see photos below
- Decorative papers for the interior and exterior – I used paste paper for my exterior
- Prints or stickers to decorate the interior and exterior – mine were fish
- A photo for the front shaker box
- A small piece of acetate – one came with my book, inside the front cover opening
- Something to go inside the front shaker box – I used clear glass microbeads, but sequins, glitter, or anything small and shakeable will work
- Something to go around the outside of the shaker box – I used craft sticks for this one, but it can be anything that will hide the edge of your acetate
- Stuff to fill your interior niche – mine was some netting, jute and a couple of fish hooks
- Stamps and inkpads, as desired
- Glue stick and Tacky glue, plus whatever other specialty glues you need to get your embellishments to stick
- A craft knife
- A hole punch, eyelet, eyelet setter and swivel – all optional
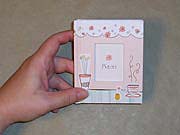
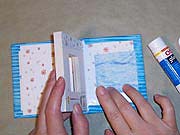
 This is what my book looked like when I started off. It’s marketed as a little photo album, but we know better, don’t we? It’s really a little altered book with an interior niche just waiting to happen.
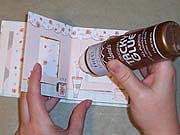
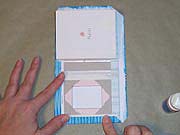
 The first thing I did to the book was glue all the interior pages together, EXCLUDING THE COVERS. Just smear a little Tacky glue onto each page, and press the pages together. Then smear a bit of glue around the outside of the pages, and around the center where the niche is. This gives the page block strength, and will keep anyone who handles the book from trying to pry the individual pages apart later. (Don’t laugh—it’s happened to me.) Let the glue dry completely—I usually just throw a couple of pieces of plastic wrap on either side to keep the block from sticking to the covers.
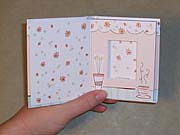
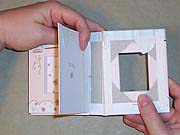 Next, pull the interior front away from the front cover. My book wasn’t particularly well constructed, so it just took a little tug to separate the pieces.
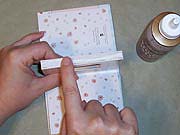
 Cover the exterior of the book. This will be pretty simple now that the book lays flat. Just cut a piece of paper slightly larger than the book, smear glue stick all over the exterior of the book, and lay it onto the paper. Next you’ll want to roll the excess inside the book. Trim your corners diagonally to miter them. You don’t want to cut right up against the corner of the book—leave a little extra, roughly the same amount as the height of the cover, so that your corners will overlap slightly. There will be two places where you’ll need to do a little snip—where the book is still attached to the cover. Glue everything down with a liberal amount of glue stick.
 Make an X shaped cut through the paper covering the exterior opening, and roll the paper inside the book, gluing down with glue stick.
 Glue a piece of decorative paper to the inside back cover of the book. This will be what is seen at the back of the niche. It just has to be slightly larger than the niche, so don’t worry if your piece doesn’t cover the entire back cover.
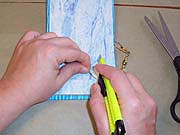
 I suspended my book from a fishing swivel, so I punched a hole at the top of the spine, set an eyelet in it, and threaded the swivel through before proceeding. You might want to do a hole and thread some fibers or tags through—whatever you decide to do, punch the hole now if you want one.
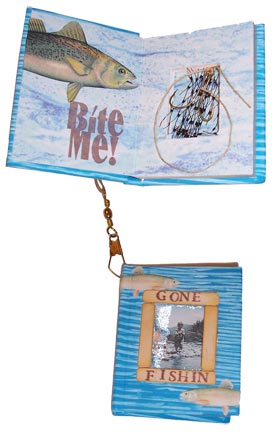
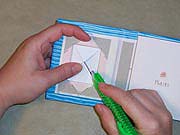
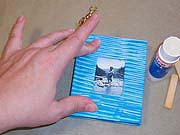
 Cover the interior of the book with decorative paper, and cut away the section covering the interior niche. Decorate the interior with stickers, prints, stamps or whatever you have in mind. Glue the page block down to the back cover. When the glue has dried, decorate the interior niche with whatever goodies you’ve assembled.
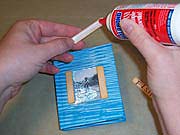
 Now, let’s do a shaker box on the front cover. First, insert a photo behind the opening. Glue it in place, and while the book is opened up, glue the whole front cover down to the liner page. Let all this glue dry completely before proceeding—if you don’t, you’ll end up with a big mess!
Put your shaker box filler onto the photo. Don’t get the opening too full—maybe a third of the image should be obscured by stuff.
Run a line of glue around the outside of the opening, and place the acetate over it. For really bulky shaker box filler, I’ve skipped the glue in favor of four pieces of foam tape around the opening, covered by the acetate—it gives the shaker box more height.
 Cover up the acetate with whatever you’ve chosen to frame the shaker box. I used craft sticks, trimmed down with scissors, edged with chalk inks, and stamped with letter stamps and dye ink. Anything can go around the shaker box—it just has to cover the edges of the acetate.

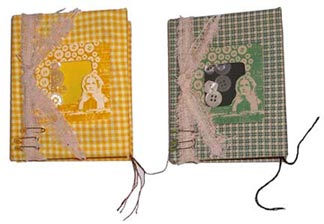 Just in case fish don’t float your boat, here are two samples I did for Leandra at PaperArtsy with a sewing theme. Instead of covering the outside with paper, I used fabric. Inside the shaker box are buttons. I painted the interior rather than using paper, and filled the niche with sewing-related items.


