 Every year, I try to do a couple of articles about recycling Christmas stuff into something new—and I usually don’t get it together to do them until after the holiday season. This year, while I was hunting through new holiday stuff at the dollar store, I had an idea that was best posted ahead of time, so you can think ahead.

These two books are made from printed gift boxes and leftover ribbon. My idea is that you’ll hit the dollar stores early, pick out the prettiest printed boxes you can find, use them to hold Christmas gifts for your family, and as soon as the boxes are emptied, snatch them up again, and recycle them into little books. They can hold prints of holiday photos for relatives far away, or CDs of photos if that’s how you roll. You can make little books to use for notes or test swatches of new techniques. You can gluebook in them, journal in them—whatever.
So, here’s how they go together:
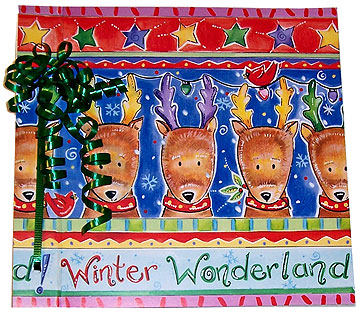
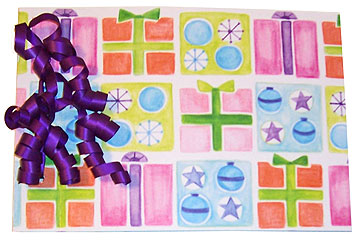
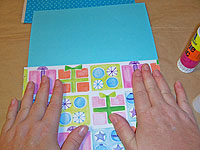
 Start with some printed gift boxes. I got this four-pack of medium boxes at the dollar store. Go early, because they always blow out of them quickly.
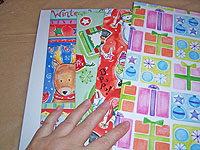
 When Christmas is over, collect the boxes. You’ll need a top and a bottom for each book. Flatten the boxes out by cutting them at the corner folds.
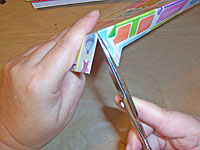
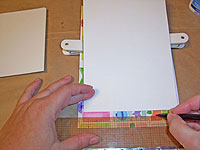
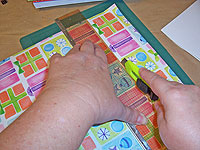 Figure out how big you want the finished book to be, and do a little measuring. If your print is directional, be sure you’re working so the pieces end up oriented in the right direction. Start by cutting a straight line for the bottom edge of the book’s front cover, removing the bottom fold of the box
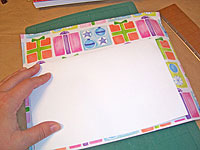 For this book, I’m going to make the pages half a sheet of paper. Covers should always be just a tad bigger than the pages, to protect the edges of your work. I placed a page on the printed side of the box, and used it as a guide for cutting, leaving just a bit extra around three sides. The fourth, left side will be where the binding is, and that’s where you don’t need the covers to extend beyond the pages.
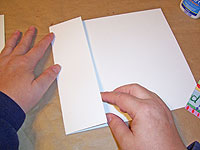
 Use the front cover as a guide to cut the back one. They should be the same size.
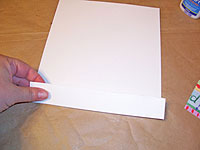
 I used the fold line on the side of the boxes as part of my cover design, since the height of the orginal box was the right size for a binding section. For my half page-sized book, a fold of roughly 1-1/2 inches was just fine. You can choose to trim your fold off completely to do a flat book, or make it narrower or wider. It’s your book, so you decide. If you’re going to use a fold, give it a good crease now.
 I decided to line the inside covers of my book with pretty papers, because the bare chipboard seemed to clash with the print of the front of the book, and the stark white of the back. If you’re using a pattern that looks good with plain chipboard, you can go without. Again, it’s your book, so you decide. If you want an inside cover lining, just apply some paper with a glue stick, then trim it to the size of the covers.
 There are quite a few different ways to bind these books. You can tie them with ribbons or fibers, use binding rings, brads, or screw posts, or do a stick binding. Check the decos and small books section for a bazillion different binding techniques.
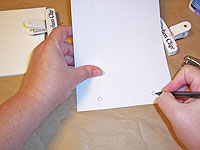
I chose to punch holes, and use ribbons to tie my books. First, I marked the holes with pencil, measuring to be sure they were centered on the fold, and equidistant from each edge. I also made sure that my holes were placed so the pages would be punched securely.
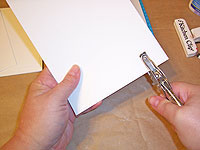
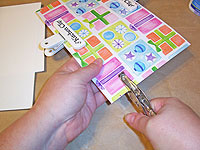 I punched holes as marked through both covers.
 Next, I prepared the pages. For most booklets, that just means cutting a stack of them the right size. However, if you’re making something that will hold photos, recipe cards, or other bulky items, it’s best to cut the pages a little long, and fold them on the spine edge to create a spacer that will give a little ease between pages.
 If you’re really into bulky stuff, do a double fold at the spine edge, to give yourself two layers of spacers. This way, your book will lay flat when it’s full, instead of turning into a wedge shape or a fan that never closes.
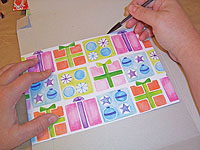
 Line the pages up on the cover, and use one page as a template, marking where the holes should be.
 Punch through all the pages, using the same template.
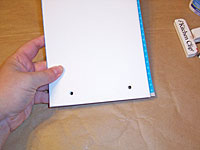 Line all the holes up on the back cover.
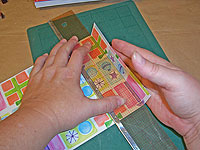
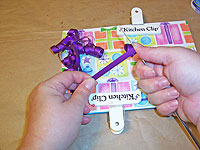
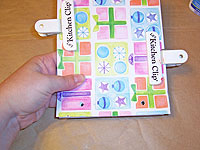 Place the front cover over the pages, and clamp the whole book to hold everything in place while you bind. I use kitchen clips or clothes pins for this.
 For fun little books used for a short time, it’s fine to use gift wrap ribbons for the binding. If you’re planning to keep the book for a long time, those ribbons might not be strong enough, and might not look pretty after a while. Try satin ribbons or twine instead.
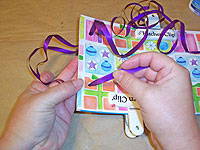
 Re-curl the ribbons once they’ve been threaded through the holes and tied in a double knot.


