 Tea bag folding is a very simple craft that produces star-shaped embellishments suitable for cards and scrapbook pages. There are an infinite number of folding patterns that produce different types of designs. Here are two examples: one that’s the simplest to learn, and one that’s a little trickier.
Terms
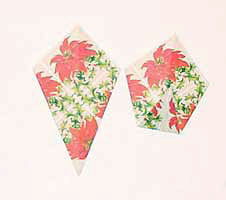
Each piece of paper used in a tea bag folding design is called a tile. The tiles used for these folds were 2 inches square, which is on the large side. Tiles can be cut in any size. The smaller the tile, the smaller the finished folded design.
Each folded piece used to create a finished design is called a wedge or a kite. Most folding diagrams will tell you how many kites to fold to complete the design. Be sure you fold your kites to be identical, or the result will not be a perfect pinwheel or star. (I have that problem quite a bit!)
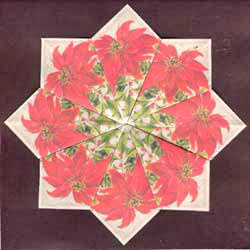
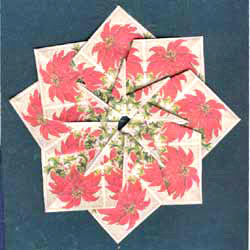
Basic Tea Bag Folded Star
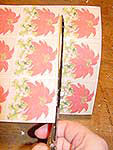 Begin by cutting out your tiles. For this design, you will need eight tiles. I used some of the printable tea bag papers available in the files section of my newsletter group. You’ll have to be a subscriber to access these tiles.
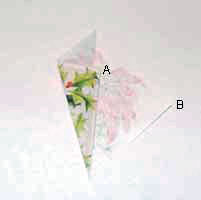
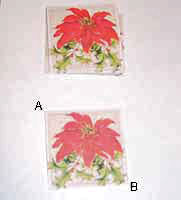 Stack your tiles so the designs on them all face the same direction. This is very important if you want to create eight identical kites. Choose two opposing corners, and mark them A and B. Since these two corners will ultimately end up underneath my finished design, I generally choose the two least interesting parts of the design. In this case, I want my lovely red poinsettia to be the largest portion of my design.
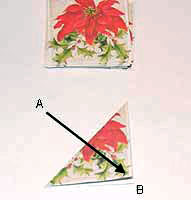 Fold corner A to corner B, and make a crease. This will be the center guideline of your kite.
 Lay your tile on its back, and unfold it. Fold corner A to the center crease.
 Fold corner B to the center crease. The two corners will now be against each other on the back side of your kite.
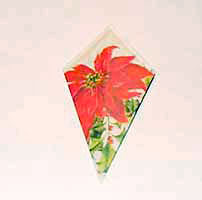 Turn your kite over. This is your first finished piece. Marvel at how lovely it’s folded.
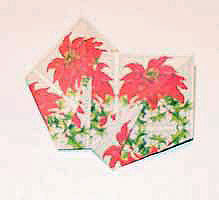
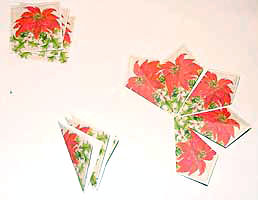 Fold the remaining seven tiles into kites using the instructions above. Be sure you keep the same section of the design on the tile in the largest section. You can see here that I kept my poinsettia in the largest section, and all my points have holly on them. After a little practice, you’ll do this without thinking. To help me make sure that all my wedges are identical, I usually lay them out in their finished design as I fold.
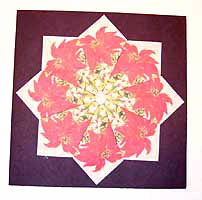 Cut a piece of cardstock to back your design, and glue the kites in place, spacing them evenly. With this basic star design, all the points meet in the center, and the sides of the kites touch each other. Usually, spacing is not an issue. I glue my wedges down using a glue stick on the back side. One swipe from corner to corner is usually enough.
If desired, you can trim your cardstock to mirror your design. Simply measure 1/4 inch or so out from the edges of your finished design, and then trim. This will mirror your star design, and allow you to position your finished star as desired on a card front or page. This finished design is about 5-3/4 inches from tip to tip using 2 inch tiles, so I mounted mine on a six inch square card. Smaller tiles will result in a smaller finished design.
 Corner Pocket Star
This design is slightly more difficult because the kites have to interlock before being glued. I have a hard time getting this one glued in place evenly, but it’s so pretty when it’s finished, I keep trying.
 This design will take eight tiles. Begin by folding them as you did for the basic star, following all the folding steps. When you have finished folding these basic kites, you’ll add one more fold, shown here: fold the smallest point up, roughly even with the two outer corners. Be sure the point remains on the center crease.
 Your finished kites will have a little slit in the center front, creating a pocket. Slide each kite into the pocket of the previous one, pushing it all the way in. Work your way around the design, sliding the eighth kite into the pocket in the seventh one. The first kite will then slide into the pocket of the eighth one to create a complete circle. Glue carefully, spacing your kites evenly.


