
My current obsession: smashing bottle caps. My boss turned me on to a box of uncrimped bottle caps in our warehouse, and asked me to figure out what to do with them. Last weekend, I went to ACCI, where I went through 800 bottle caps, teaching people how to work with them. Here’s the quick lesson:
 Keep in mind, these are virgin uncrimped caps. This technique absolutely will not work with the cap off your soda or beer bottle—those caps have been through a crimping machine, and are shaped differently.
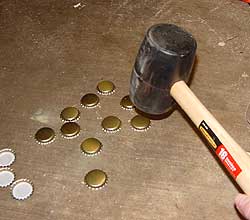
OK, line up your bottle caps on a hard surface, crown side up. I do mine at home on my concrete garage floor. At ACCI, we packed hardwood cutting boards and eyelet mats, and those worked pretty well at protecting our tables.
Give the caps a couple of light taps with a rubber mallet. This is just to get them started—we’ll do the real smashing on the flip side. Do not try this with a hammer, or you’ll end up with deformed bottle caps. A mallet will distribute the pressure evenly.
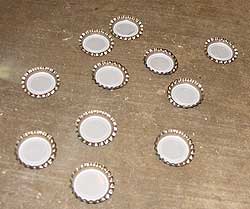 Flip the caps over and place them on your work surface crown side down. Beat them with the mallet like you mean it. With a little practice, this takes two or three good whacks. The outer edge of the cap with roll outward, and you’ll end up with a lovely round metal embellishment that looks nothing like a bottle cap.
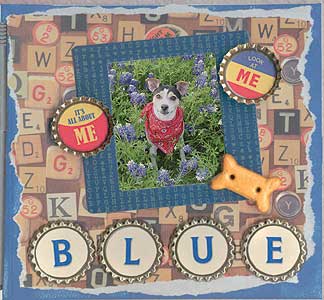
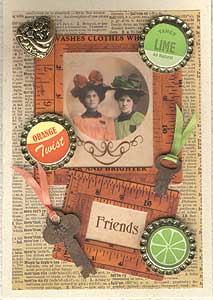
Now, what the heck can you do with flattened bottle caps? Fill them with things. I designed a line of cardstock stickers for Design Originals that are specifically for bottle caps, but a 1″ round hole punch will do the trick for those who want their own images. Punch the image of choice, dab a little E6000 glue onto the cap, and position the image. Images can go inside the flattened cap, or on the back side.
Caps can be colored with alchol-based inks, which lets the metal shine through. They can be painted with acrylics or Lumiere, dabbed with Rub n Buff, rusted or patinaed with products from Modern Options. We sprayed them with spray paint and webbing spray—very grungy. We dabbed them with chalk inks and heat set them—a nice mat finish. Use your imagination.
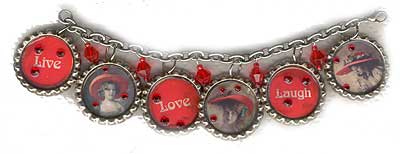
Want to make holes for jump rings? Try a 1/16″ paper punch. I know it sounds impossible, but the metal really is soft enough to allow a simple paper punch to go through it. Alternately, try a drywall screw and a block of wood—a couple of taps with a mallet against the screw, and you’ll have a nice hole. We went nuts at the office making jewelry with these, including the bracelet at the top of the page.