 Last summer was all about bottle caps for me—I ordered them, I designed stickers for them, I taught 800 people how to flatten them. By the end of July, I was sick of looking at bottle caps, and ready for something new. What else could I play with?
Fortunately, I didn’t have to look very far. Since I’d been playing with round metal things for several months, I was oddly aware of round metal things. Somebody flipped a juice can lid at me, and I turned it over a couple of times, and decided that would do just fine. I waved it around the office, and nobody seemed very excited about it. I didn’t care. I found a source for juice lids, ordered a bunch, and started playing.
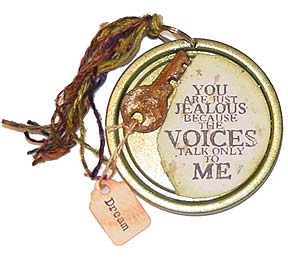
Naturally, the first thing everyone asked me was, “What can you do with them?” Asking me that is always dangerous. The first thing everything turns into around here is a book. I made a lovely little juice lid book with paper pages, and hung it from a watch chain. Then I made a second one from six juice lids, so it had metal pages. (That’s how the little green book at the right is made.) I cut photos and glued them to the center, and on the back side. I painted them and turned them into magnets. I wrapped them with wire. I used them for captions on scrapbook pages. If you could put something in it or hang something on it, I did.
OK, I suppose I should shut up about the wonders of juice lids, and show you how to make something from them…
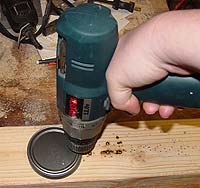 This is how to put holes in juice lids: they’re stacked half a dozen high on a scrap of two by four, and I’m using a real drill with a titanium drill bit made to go through metal. DO NOT use cheap drill bits, because you’ll break them. DO NOT try this with a Dremel. (Don’t make me show you a photo of the trusty Dremel whose motor I blew up while drilling 800 juice lids for February’s CHA make-it take-it. Not pretty.) If you’re just punching a hole in a couple of lids, a hammer and nail will work just fine. More than that, get a drill.
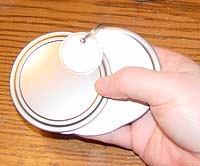
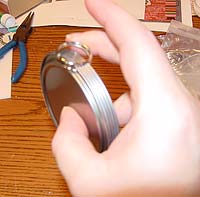 Some day, I’m going to conquer one-handed close-up photography. This is a slightly blurry photo of how to slide a ring through drilled juice lids. I usually use split rings for this type of project—you know, the kind with two layers of metal they put on cheap key rings, that always end up breaking your fingernails. My boss hates these because she can’t get them started. I use the edge of the first juice lid as a wedge, driving it against the start of the ring and pushing it up. Then, I slide the rest of the lids right behind it, moving them as a group. If I’m making a book with paper pages, I sandwich the paper between the two pieces of metal, and move the whole thing as one piece.
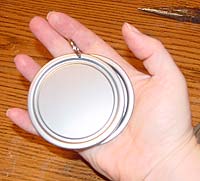 There you have it: six juice lids joined together by a split ring, ready to be decorated.
 Here’s a two lid book with paper pages. A 2-1/2 inch paper punch works just fine for large lids. I joined this book with the ring that comes with these metal edge tags—I usually toss those rings, because I have so many of them. It’s nice to be able to use them for something.
 Now for the fun part: decorating.
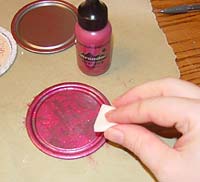
I tried using some alcohol inks on the juice lids, thinking that would be a fast-drying way to color them. Wrong. The ink beads off the front side of the lid—it’s got some kind of coating on it, I think. Same thing with my Colorbox Chalk inks—I got a little bit of color on there, but it was speckly and pale. Bleh. Don’t use inks.
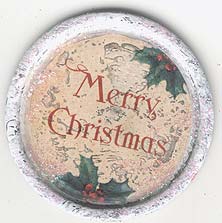
On the plus side, just about every paint I threw on these looked good. The piece at right is made using gesso, glitter glue, and a transparency. It has kind of a funky shabby look to it, which I encouraged with my painting.
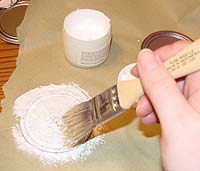 First, I coated the lid with gesso, using a bristle brush. Rather than stroking the gesso on, I poked at the lid with the brush—smoosh, smoosh, smoosh. I wasn’t too worried about covering up every bit of silver. It gave a nice texture to the lid.
While the lid was wet, I cut a 2-1/2 inch circle from a transparency sheet, and laid it right on the wet gesso. Then I went away and left it alone until it dried.
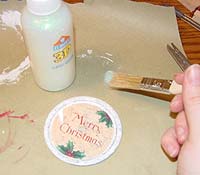 Once the gesso was dry, I applied some glitter glue randomly to the edges, to make the gesso look more like snow. I usually apply glitter glue just like paint—I squeeze it onto my palette (or in this case, my work table), and use a brush. Once again, I poked at the piece rather than stroking the glitter on. Randomness is good, right?
 I also painted lids with both Adirondack Acrylics and Lumiere. Both gave excellent results. The Lumiere is a little denser, so the color was completely opaque. The Adirondack let a little of the metal shine through, especially when using lighter colors. The green book at the top of the page is done with Adirondacks (the acrylics, not the inks—remember, don’t ink!)
Added after the article was posted:
Some of you have written in asking why I didn’t just go buy a box of mason jar lids. I did. I didn’t like them—there’s a wicked coating on the inside of the lids, and a red ring I didn’t care for. However, if you must go buy a box and try them, they’re cheap and readily available in just about every grocery store. Knock yourself out!


