 I was playing with silly label designs earlier in the week, and ended up doing a collage sheet of them for Ten Two Studios. (Check the Halloween section if you’re interested.)
I have a ridiculous collection of glass bottles, rescued from the kitchen trash. Most of the salad dressings, marinades and salsas I use come packaged in glass—and honestly, sometimes I snub those products if they’re not packaged that way. I want the flavors, but I also want the surface to alter when I’m finished. I don’t ask for much…
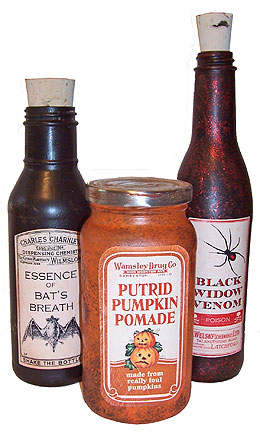
Anyway, I put the two together, and came up with these bottles, which I think I’ll fill with candy and give to some friends who have the same dark sense of humor I do. Here’s how I put them together:
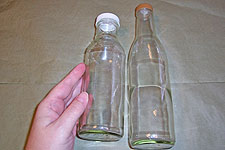 I started with clean bottles. I just toss all the bottles I’ve emptied each week into a sink of soapy water, and let them soak overnight. In the morning, I can usually peel the labels right off. Those that are stubborn get the scrub brush, and any glue that remains comes right off with a little Goo Gone.
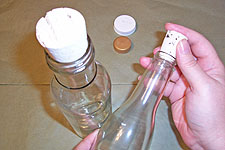 A few of the bottles I chose for this project came with plastic caps. I’m not big on working with plastic, so my solution is to toss those caps, and replace them with corks from my local craft store. Another option is to replace them with lightbulbs, sort of like I did in the Decoupaged Glass Bottles article. Some of the bottles had metal lids, which are easy to alter—just sand away any paint, and color with alcohol inks, or cover with UTEE or embossing powder.
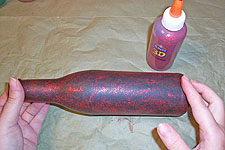
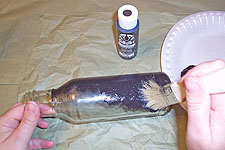 I wanted a slightly grungy look on the finished bottles, so I started by basecoating with cheap acrylics. I used a coarse bristle brush, and just randomly poked at each bottle with paint. This eliminates brush stroke streaks, in favor of a sort of textured effect, and also leaves behind more paint in some areas than others, creating a nicely uneven look rather than a flat basecoat.
 When the basecoats were dry, I applied more texture using a sea sponge. I’ve done a quick video on sponge painting to describe this technique for those who haven’t seen it before.
 What’s a potion bottle witout a little glitter? On some bottles, I applied glitter glue here and there, wiping in on with my finger.
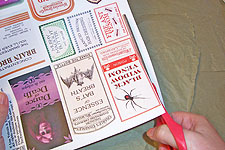 While all the paint and glitter was drying, I cut out the labels from my collage sheet.
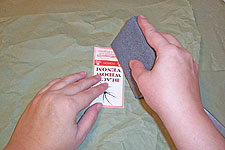 In keeping with the grungy theme, I aged the labels a bit by rounding their corners, and giving them a quick sanding with a sanding block. The goal here is to make the image a bit less perfect and even, so I sand in places that won’t effect the readability—edges and unprinted areas get more sanding. The labels can also be toned with chalk inks if you wish.
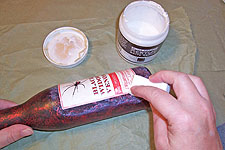 To apply the labels, I did a quick coat of matte medium on the whole bottle, and on the back side of each label, then stuck the two together. I light coat of medium over the top of the label while it’s still wet will keep it from rippling or curling, and seals the edges to the bottle. Let the whole thing dry completely before handling.
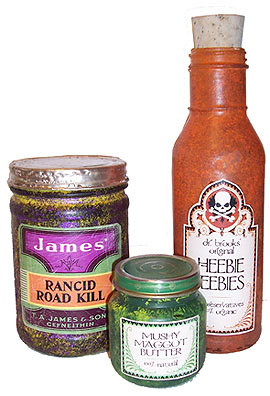 Here are a few more bottles, ready to be filled with goodies.
I’ve left my bottles rather plain, because I’m in a less is more frame of mind at the moment. Perhaps they’ll be further decorated with fibers and charms later. I also have my eye out for the fake spider webbing sold as Halloween decorations—I may apply just a little bit with matte medium later.
Now, go recycle some bottles!


