 Artist Lynn Dewart turned me on to using metal flashing from the hardware store as an art material. I had always struggled with sharp edges, but Lynn cut hers using dull scissors, creating a safe for the fingers edge. Since I learned this, I’ve been going nuts making metal stuff! Flashing is cheap, comes in all different sizes, and is readily available. Plus, I needed a roll to line the door of my hot water heater cabinet anyway.
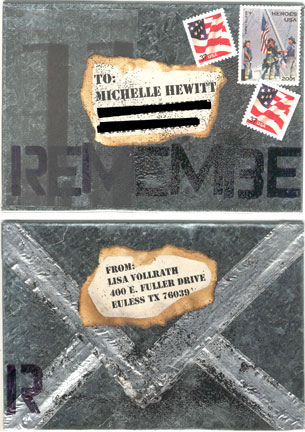
At right is a set of metal envelopes I made for Graceful Altered Envelope swap on Alterations. The purpose of this swap was to make envelope art without actually filling the envelope with anything important, so I used the following method for making permanently sealed envelopes.
Materials:
Metal flashing
Old, dull scissors
Metal ruler
Envelope template (try Red Castle, Mirkwoood or By Donovan for free printable templates)
Metal tape from the duct section of the hardware store
E6000 Adhesive
Masking tape
Collage materials of your choice
Instructions:
 Tape your envelope template to your roll of flashing, and cut around it. I tend to do my big cuts first to get the piece off the roll, and then do detail cuts afterward.
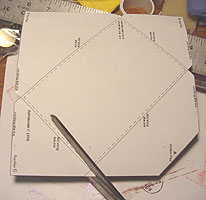 Now that the envelope has been cut away from the roll, clean up your cut lines and do any detail cutting. My envelope template had for little triangular notches, and these were easier to cut when off the roll.
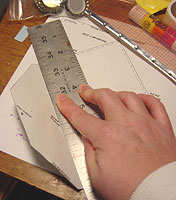 Place a metal ruler on the fold line of the bottom flap. Gently fold flap upward while pressing down on ruler. Slide the ruler out, and remove the pattern. Press flap down as far as it will go.
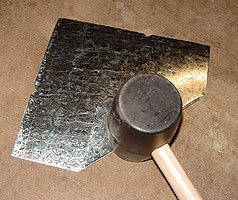 Flatten crease with a mallet. I generally do any mallet work on my garage floor, because it’s a smooth surface that I can’t hurt too much.
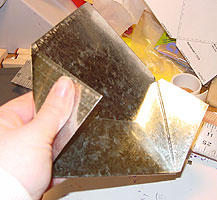 Using the same method as above, fold the side flaps of the envelope inward. (Remember those notches I cut? Those told me where the fold lines for the remaining flaps were.) Flatten crease with a mallet. Fold the final flap down, and flatten crease with a mallet.
Once all your creases have been flattened, apply metal tape over the cut edges on the back side of the envelope, and burnish with your thumbnail. I found that my envelope still wanted to pop open, even after working with the mallet, so I glued my flap closed and weighted it until it was dry.
Decorate your envelope. On mine, I did some layering with acetate, then burned the edges of my adress and return address and applied them. I heated my envelope and sprinkled it with embossing powder—this is best done in small sections rather than trying the whole envelope. I work on a ceramic tile when doing this type of work, to protect my work surface from prolonged heating. I also stencilled on the metal, using a Sharpie. Metal flashing will also accept paint, though if you’re doing anything detailed, it’s best to use metal paints.
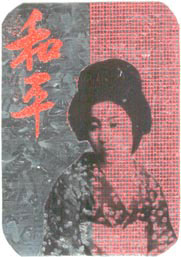 At right is a metal ATC I made for a non-paper swap on the ATC Hub.
Materials:
Metal flashing
Old, dull scissors
ATC template (I used a die-cut playing card that was the right size)
Masking tape
Collage materials of your choice
Tape the ATC template to your flashing, and cut it out. (When I’m mass producing blank metal ATCs, I trace my template lightly in pencil, and do a whole row of them, side to side.)
Decorate it! For my card, I used a piece of origami mesh applied with a glue stick. Over that is an acetate print of a geisha photo done on a black and white laser printer. The peace symbol is stamped with Brilliance ink, and then embossed with orange embossing powder. Be sure to use tongs or a mit, or to lay your card on a tile when you’re using a heat tool on it, because a piece this small heats up very quickly.


