 I’ve been collecting vintage photographs for about 15 years. Along the way, I’ve managed to aquire a small collection of tintypes. I thought these would look wonderful in a recent altered book project, but I really didn’t want to give up the real things. My solution was to create some fabulous faux tintypes that were lighter and less fragile than the real things.
(Author’s note: after I first published this article, I had quite a few people write asking me what a tintype is. Bascially, it’s an early form of photo that was printed on a thin sheet of metal. Tins are still available in antique stores and on eBay, but they are becoming increasingly expensive, especially for those of any decent size or quality.)
To make these, you’ll need:
- Vintage photos (they don’t have to be tintypes)
- A computer
- Graphics software (I used Adobe PhotoShop)
- A scanner
- transparencies compatible with your printer (I used laser transparencies)
- Cardstock (I used ivory)
- Mylar, foil or flashing (I used aluminum foil)
- Adhesive (I used a Xyron machine)
- Scissors
- Tape
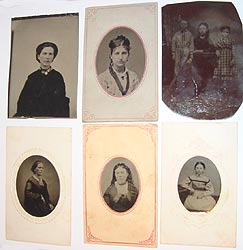 I started out with six old tintypes from my collection. I’ve also used this technique with cabinet cards and old real photo postcards. As long as the image has a good amount of contrast, it can be converted to a convincing tintype.
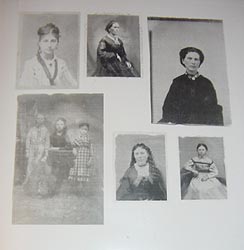 I scanned my tintypes, and created two copies of the resulting image. With one image, I manipulated the photo portion of the tintypes, cleaning up rough edges, adjusting the brightness of those that were extremely dark, and just generally doing any retouching that was necessary. Once I was happy with the new, improved versions of the photos, I printed them onto a transparency. Since I was low on inkjet ink, I used my laser printer, which gave me black images on a clear background. This technique also works with inkjet printers—it just takes a little longer because there’s drying time involved.
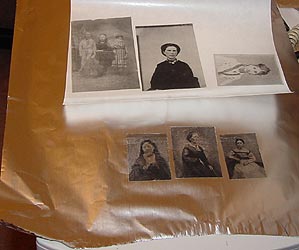 I cut out my transparency images, ran them through my Xyron, and adhered them to the wrong side of aluminum foil. I’ve also done this using both gold and silver mylar, which is shinier, and tin flashing from the hardware store, which gives a totally convincing weight. Since I was looking for less shine and less weight, I decided to give foil a try. Once glued, I cut around the outer edge of my new tintypes, trimming away any excess foil. Those tintypes that came without frames were run through the Xyron again, and adhered to a piece of cardstock to give them a little more body.
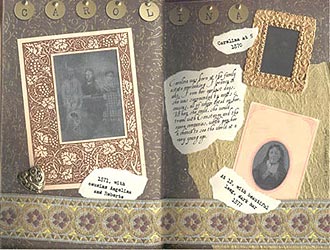
 With the second scanned image, I made new versions of the tintype frames, and printed them out on cardstock. Since my project called for items that looked aged, rather than cleaning up the frame scans, I actually added a little grubbiness to them. Once printed, I trimmed around the edges and cut away the centers, leaving frames. I taped the new tintypes in place on the back side of the frame. Since these were for an altered book, it wasn’t necessary to finish the backs. If you like, you can finish yours with a piece of cardstock on the back. For a nice touch, do a faux photographer’s mark on the backing before you attach it.
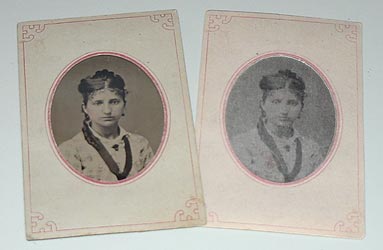
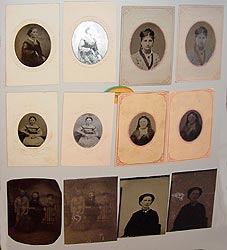 The finished batch of tintypes. In each pair, the original is on the left, and the fake is on the right. Not bad, and definitely the safest way to use some of my lovely tintypes without ruining them.


