
I think I’ve written a bazillion articles and lessons, and designed more than my share of kits using empty metal candy tins. I love them! They’re the perfect small surfaces for all sorts of arty techniques. I’ve turned them into shrines, hanging ornaments, little ATC sized suitcases, drawers for altered books, and I can’t remember what all else.
Up until recently, we’ve had smooth Altoids tins on which to work our arty ways—but curses, Altoids has now switched to embossed tins with a raised logo that gets in the way of painting, inking and even collage work. What’s a girl to do?
One way to deal with that stupid embossed logo is to just cover it with a piece of chipboard, and then cover that with some metal flashing tape (available at most hardware stores, and also in small lengths at Ten Two Studios.) This leaves a metal surface that can be inked or embossed easily. You can also paint it or collage over it, by why you’d want to, I don’t know. Here’s how it works:
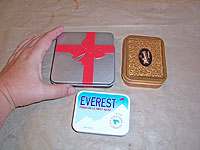 Start with clean, empty tins. Here are three that have some manner of obnoxious embossing on them. Sorry, I couldn’t find an Altoids tin—I still have a large stash of the flat tins that I’m hoarding for this year’s Christmas ornament kits.
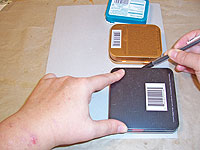 Trace the tops of the tins on a piece of chipboard. Cut the shapes out slightly inside the traced lines. Test the fit, and trim if necessary before gluing.
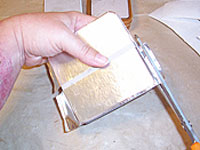
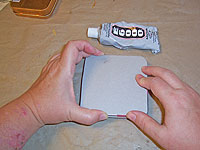 Glue the chipboard onto the top of the tin using your favorite sticks-to-metal-things glue. I used E6000.
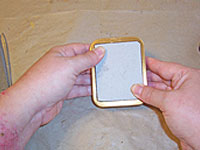 One of my tins had an embossed medallion surrounded by a border. I went ahead and trimmed down the chipboard to the size of the medallion before gluing it in place.
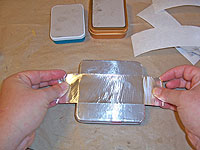
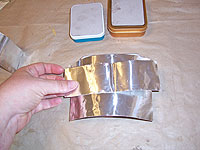 Cut pieces of metal tape, long enough to cover the top of the tin and extend down over the sides. Most small tins can be covered using two pieces in each direction, but my large, square tin required three.
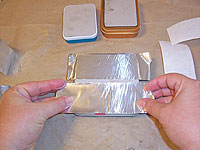 Peel the backing off the tape, and apply the first layer. For small tins, this will just be the first piece.
 Burnish the heck out of the taped top with your weapon of choice. I always use the handle of my scissors for this. A spoon or the back of your thumbnail will work, too.
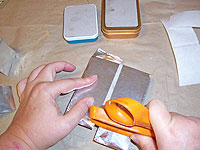
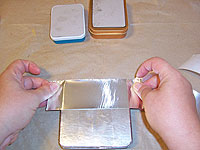
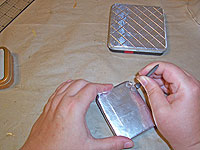
 Fold the extra tape lightly over the sides, and mark a cutting line with your thumbnail.
 Trim away the excess tape, and then burnish it down over the sides. Burnish hard over any folds you make at the corners.
 Apply the next layer of tape, and repeat the burnishing. For small tins, this is the second piece. For larger ones, this is probably the center piece. Go ahead and overlap as much as you want—the lines pretty much go away after burnishing.
 Rotate the tin 90 degress, and do another complete layer of tape. So, you’ll do one complete layer from top to bottom, and a second from side to side. Tape and burnish, tape and burnish.
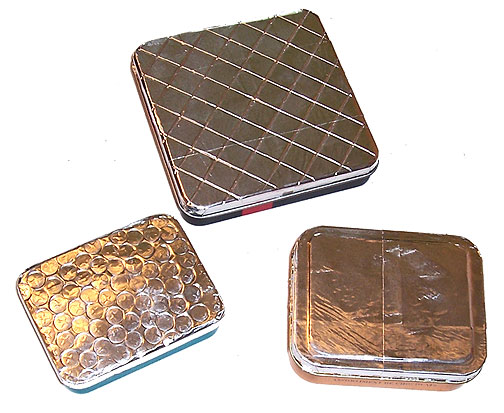
If you just want a solid, flat top, you’re done. Easy, right!
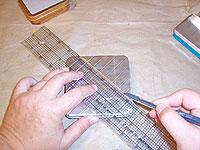 The bonus of this technique is that it can be embossed easily. One simple way of doing this is to just use a ruler to draw diagonal lines from corner to corner, and then create a grid pattern.
 Another easy way to emboss is to use a screw or nail, and press hard into the tape to create circles. I used a drywall screw to create a sort of honeycomb pattern on one tin.


