 I chose small glass jars simply because liquid walnut ink will eat through plastic or metal in short order—and nothing is quite as horrifying as seeing something that stains so quickly oozing out of its container!
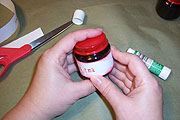
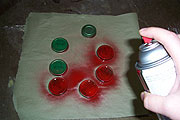 I purchased some three for a dollar jars of baby food at my local grocery store, emptied them, removed their labels, and cleaned them up. That left me with bare glass, but green metal tops with printing on them. The first thing I did was paint the tops bright red with spray paint. I opted for this rather than my usual burning off the paint with a torch because these lids have a rubber gasket in them to create a really tight seal—and that seal would have been damaged by the heat of the torch. My desire was to have jars that sealed securely, but were also sort of fun.
 Since walnut ink stains everything that comes close to it, I decided to fill the jars before decorating them. I figured that way, I wouldn’t dribble ink all over my paper labels. Yes, I’m a messy worker! Knowing that often dictates how I proceed with a project.
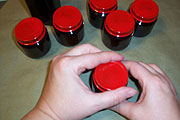
Once the jars were filled, and the painted lids were completely dry, I sealed each bottle firmly.
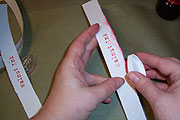
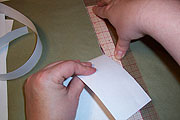 To create labels, I tore paper in one inch strips. These were slightly narrower than the flat section of the jars. I chose tearing rather than cutting because I wanted to do a little inking along the edges, and tearing creates a more absorbant area for the ink.
 I used my current favorite letter stamp set to print the labels. I contemplated doing this on the computer, and putting storage and use instructions on the labels as well, but decided I liked the handmade approach better. I had to remind myself that these were gifts, and not products being offered for sale! Since I delivered these in person at our group’s monthly meeting, I could just tell the girls to store the ink in their refrigerators.
 I edged the stamped labels with some chalk inks.
 I applied a swipe of glue stick to the entire label, and wrapped it around the jar. I trimmed the ends with scissors, leaving a small overlap, and glued the heck out of the ends to hold them in place.
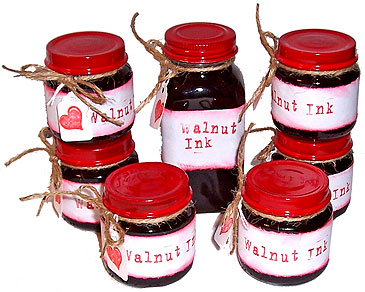
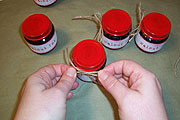 Each jar got a little bow made from twine around its neck, and a small tag stamped with a heart. I’m in a plain and simple phase, so I stopped there. Perhaps next time around, I’ll start with a printed paper, emboss the stamped message, and glue on some buttons or tiny rosebuds. These can be as plain or as embellished as you wish.
The jars took about an hour to put together once the spray painted lids were dry. I kept thinking they’d look cute filled with red jelly beans or red hots!
Edited to add: For those who are asking for the recipe for walnut ink, it’s posted here at Go Make Something.


