
Many moons ago, I wrote the first step-by-step article on how to cut a niche into an altered book. While that technique is tried and true, it’s also kind of a pain. It requires endless hours to cut a good niche into a book. I decided to use a model-making cheat on a recent project, to create the same effect in much less time.
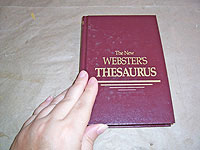 Here’s one of the books I started with. I bought a pile of these little books at the thrift store, and thought they’d make great book shrines. A few things to know about them: they have sewn spines, sturdy covers, and the page blocks (that’s the part in between the covers) are almost exactly 1/2″ tall. All these things are important for this process to go quickly.
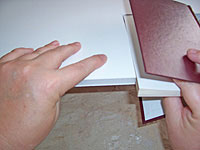 I’m going to replace the 1/2″ page block with some 1/2″ foam core board. This is twice as thick as normal foam core, but most craft stores carry it. One sheet will do quite a few books.
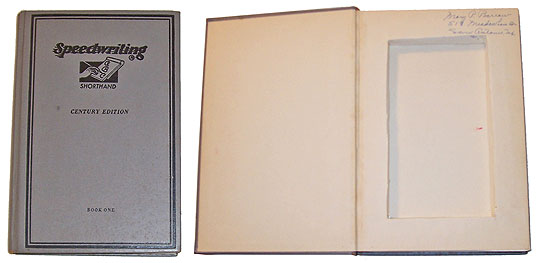
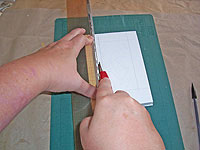
 The first thing to do is cut out the page block. Most sewn books have endpapers that are folded at the spine, so the lining of the covers, and that first, thick page of the book are one piece. If possible, I like to preserve this page, so I flip past it, to the first real paper page of the book, and cut into the stitching at the spine there. Very often, it just takes a few quick swipes of a craft knife to remove the page block—just be careful not to cut into the book’s binding.
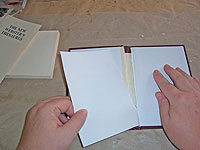 Once the page block is gone, I usually remove the back flyleaf. The new niche will enclose the back inside cover, so this extra page isn’t necessary. However, the front flyleaf will come in handy later, so I leave it attached.
 The page block can act as the pattern for the new foam core niche. Just trace around it, then true up the lines with a ruler.
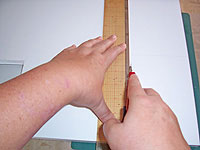 Cut the new block from the foam core using a craft knife with new, sharp blades. One of the keys of getting a clean cut in foam core is to use sharp blades. Another is to make long cuts, rather than hacking or sawing ones. I usually do one cut to get through the upper layer of paper, another to go through the foam, and a last one to cut through the bottom paper.
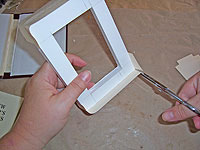
 Test the fit of the block, and if necessary, trim away any excess, or any uglies.
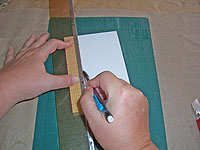 Now, the block needs a hole. Measure and mark. I almost always leave at least a 3/4″ frame on small books, and 1″ on larger ones.
 Cut the marked area away, using long strokes. By the time you finish cutting this, it will be time to discard the blade. Foam core is really hard on blades. Don’t bother trying to get by on a second book with the same one—it will come out looking like my dog chewed the edges.
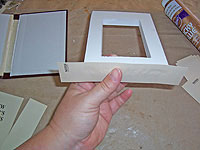
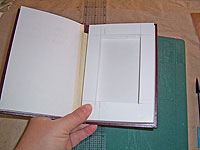 Another test fit, to be sure the block looks as I intended.
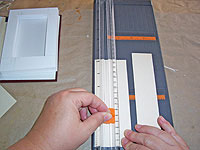 Now, it’s time to cover the new block. Most books have a few plain, empty pages in them at the back, and these are great for covering the foam core edges. Just cut them into 1-1/2″ strips.
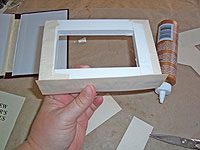
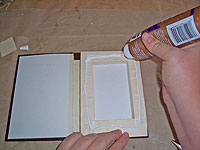
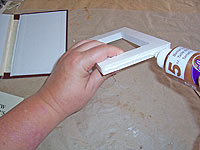 Apply glue to the top and bottom edges of the foam core, and spread it thinly with your finger.
 Center a strip of the book paper on the gluey ends, letting some paper extend beyond either side. Apply a bit of glue on either side, and fold the strip so it starts to go up each side.
 Clip the corners, and cut away a small triangle. These don’t have to be perfectly mitred corners—just clip away a bit to reduce bulk.
 Fold the excess papers down on the front and back sides, and glue them in place.
 Glue a strip of paper on either long side, fold down the excess on the front and back of the foam core, and glue it down. Now, your entire outer edge is covered in paper.
 Repeat with the inside edges, encasing them in paper as well.
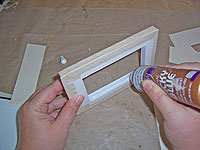
 Position the block in the book, and apply glue to the front side of the frame, spreading it thinly.
 Close the book, sticking the block to the front flyleaf. Check to make sure you love the positioning, then weight the whole thing down for half an hour, and let the glue dry.
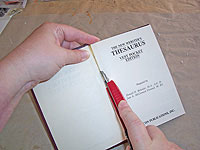
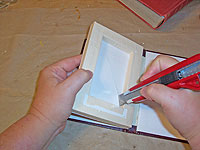 Open the book, and use a craft knife to cut away the center hole in the flyleaf paper.
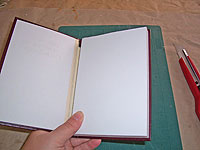
Here’s the new book, ready to decorate:

I’ve left the niche loose, so I can add a background paper easily before gluing it down.


