 Let me start this article by saying I’m not much of a rubber stamper. I’m sort of clumsy with stamps—my images aren’t always clear, and I often end up with that little extra ink halo around them. Nine times out of ten, I stamp with a plain black inkpad. I don’t run right out and buy the latest and greatest new stamping stuff that comes to market.
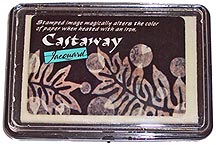
Having said that, when I read the promo material for Jacquard’s Castaway pad, I did run right out and buy one—well, OK, I ran to my computer and ordered one. According to Jacquard:
Castaway is a truly unique stamp pad that alters the color of the paper instead of adding color to the surface. The result is a marbled or dappled antique look that is similar to batik fabric. Every paper is different.
This sounded like fun to me—maybe this pad was a cleaner, neater, less stinky version of stamping with bleach? I had to give it a try.
Another big disclaimer here: I find it difficult to follow someone else’s directions. Silly, for someone who spends the better part of every week writing instructions, but there you have it. I learn better if you show me than if you write it out for me.
On the back of the Castaway packaging, there are these directions:
Stamp image onto colored paper. Let image absorb into paper for about 5 minutes. Use dry iron at cotton setting to heat the image. The ironing will activate the color altering process. Works on most papers but not on coated stock, or pigment colored paper such as laminated board.
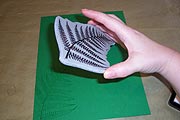 Armed with these instructions, I chose a fairly large, detailed stamp, and some green Bazill cardstock. For those of you not familiar with this brand of paper, it has a sort of woven texture stamped into the surface. I got my stamp good and wet with the Castaway medium, and stamped around the edges of my paper. My goal was sort of a nest of fern fronds with a bare spot to hold an image.
 The medium is clear, which is tough if you’re looking to do more than one image. Holding my paper at an angle to catch the light, I could just barely see where my first image was, so it was a challenge to judge placement of my remaining images.
I stamped several pieces of paper with various images, and also did the ATC backs below, then walked away for a few minutes. Waiting five minutes is an eternity when you’re not the Princess of Patience…
 While I was waiting, my iron was heating. I decided to cover the image with a lightweight piece of paper, because I didn’t really relish the idea of putting my iron onto mystery medium. The instructions don’t say to do this. Maybe this was one of my problems.
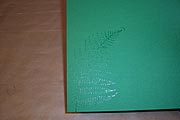
 I ironed. I peeked. Nothing much was happening. I ironed a little more, then peeked. Pale changes, but nothing spectacular. I ditched the cover sheet and ironed more. A lot more. Here’s the result:
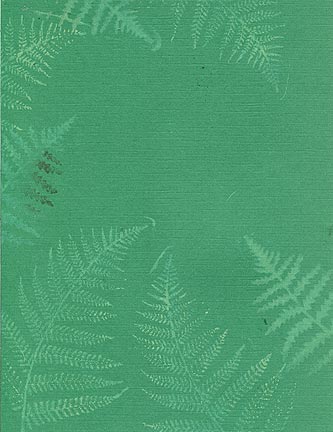 I have to admit, in the scan it doesn’t look so horrible. In person, it’s a bit of a disappointment. The color was removed a bit, but not nearly as much as I was expecting. See the brown patch at left center? That’s where the medium actually started to burn. This stuff is a little picky—not enough heat, and nothing much happens. Too much heat, and it burns.
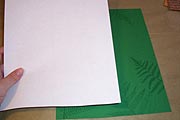
I stamped sunflowers on yellow Astrobright paper. Nothing good happened. The paper wrinkled from the medium, and the sunflowers really didn’t show up well. Ditto the stuff I stamped on patterned scrapbook paper—but the instructions say that this medium is not for pigment colored paper, so I sort of knew that anything that had been printed with ink would not work well.
So far, I was sad I’d wasted eight bucks on this stuff.
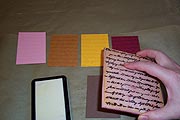 I always have ATC blanks at hand. I usually cut up any excess cardstock pieces and toss them on the pile, so when I feel the urge to make ATCs, I have backgrounds ready to decorate. I grabbed an assortment of colors, and stamped them with my favorite script background stamp.
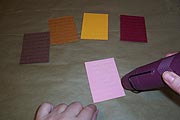 I ironed some cards, using the cover sheet as I did above. I also gave a couple a blast with a heat gun, just to see what would happen. Here are my results:
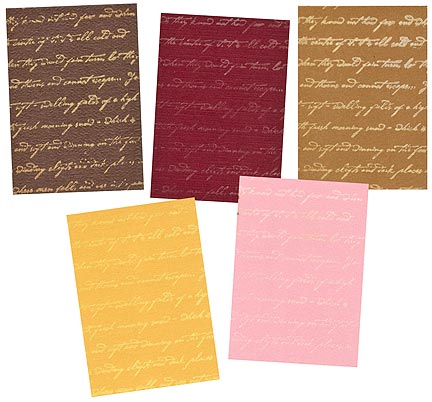 This was closer to what I expected, although as you can see, the results varied. The two browns worked really well—they were cheap cardstock. So was the burgundy piece at top center, and it wasn’t so great. The yellow worked well, but the pink piece was sort of a bust. The pink was one of the pieces I hit with a heat gun, and there are burns along the left edge where the medium scorched. The top right brown card was also heat gunned, and it didn’t burn at all.
All in all, I wasn’t too impressed with this pad, although I was encouraged by some of the results I achieved on the ATC backgrounds. If I have time for trial and error, I might use it again. It will probably be something I use more for ATCs than large projects, though—and definitely not something I’ll use when I’m in a hurry.
One more thing I should mention: I ordered this pad from an online retailer. The medium on the pad is rather thin, and a good amount of it leaked out of the pad onto the packaging during transit. I’m not sure whether this had any effect on the usability of the pad, but I feel it certainly must have shortened its lifespan.


