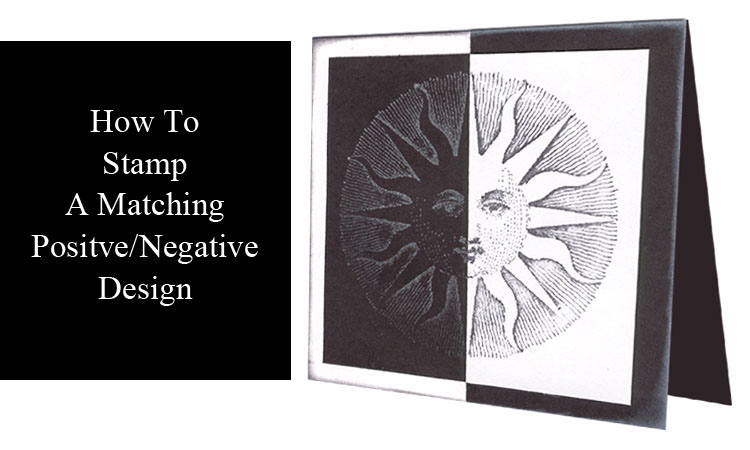

Light On Dark, or Dark On Light?
When working with stamped images, most of us default to stamping a positive image: a light background paper, with dark ink. That combination often produces the best result, even if the person applying the image is somewhat new to rubber stamping.
One of the more challenging aspects of rubber stamping is creating successful light images on a dark background, to form a negative. Very often, a stamp that’s perfectly lovely when stamped with dark ink on white paper looks positively creepy when stamped in the negative.
One way to have some fun with positive and negative is to split the image: half dark on light, and half light on dark. This is particularly effective when using black and white inks and papers.
How It Works
The basic concept is to stamp the same image twice: once with black ink on white paper, and then again with white ink on black paper. Once that’s done, you can cut and combine pieces to create your own unique design.
Just about any image will look nice stamped with black dye ink on white paper. The trick is to find something that will also look decent stamped with white pigment ink on black. This might take a little experimenting. In general, stamps that have less detail look best stamped in white.
Wicked White Ink
One of the keys to this technique is to use a good quality white ink. My favorite white ink is Tsukineko’s Brilliance Pigment Inkpad in Matte Moonlight White. It’s a nice, bright white that goes on without looking like chalk. It sets with heat, and it’s water based, so it cleans up quickly.
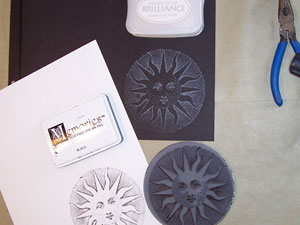 The first couple of stamps I tried were too detailed, and the white pigment ink made them look mushy. This stamp seemed to work well, though—a bit of detail, but nothing too fine.
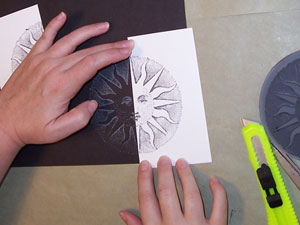
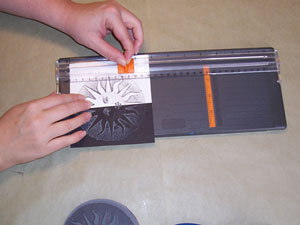 I split my white image in half, right up the middle of the sun motif. That gave me two white halves to work with. I did NOT split my black image. I find this technique works better for me if I don’t make cuts in both images.
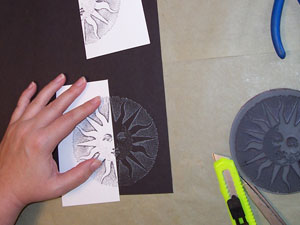
 After lining up my second white piece, I decided that I liked the more detailed portion of the face stamped in black. From here, I can simply glue my white piece down onto the black.
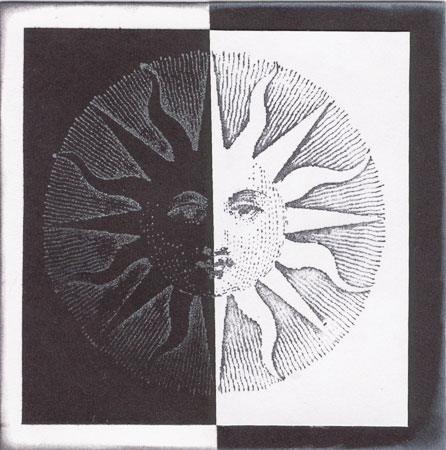
 A little trimming to square the piece up, and it’s ready to be applied to the front of a card. I decided to use my leftover paper to create a black and white background. I glued the black scrap in place behind my sun face, leaving a wide border, then applied the whole thing to a white card. I trimmed the black excess away, and my black and white pieces were perfectly aligned.
Try this technique with your favorite stamp, and see what sorts of fun designs you come up with!
This article was originally published in the August 2005 issue of The Monthly Muse.


