 First, you need the right ink. For many new stampers, plain old pigment ink will do, since it’s probably already in your stash of supplies. My pigment ink of choice is Brilliance, but other suitable pads include Crafters, PetalPoints and VersaColor. Pigment inks are pigment mixed with a binder, which helps the emobssing powder stick to the surface. They also have a longer drying time than solvent or dye inks, which is important. Another choice is an embossing inkpad, which usually contains a binder, or a binder mixed with a tiny bit of pigment to create a pale tint. These pads are great for folks who do a lot of embossing, and I’ll address them towards the end of this article.
The next supply you’ll need is embossing powder. This is a thermographic powder made with a very fine resin that fuses when heated. There are dozens of brands and qualities out there, and each stamper has her favorite. If you’re new to embossing, just get a small container of very fine black powder to start. Eventually, you’ll grow your collection of colors and finishes the same way you grow your inkpad collection.
Last, but not least, you’ll need a heat tool. Most rubber stamp and paper craft oriented stores will carry one for around twenty dollars. Trust me when I say you cannot emboss without one—your blow dryer won’t work, because it doesn’t get nearly hot enough to melt the resin.
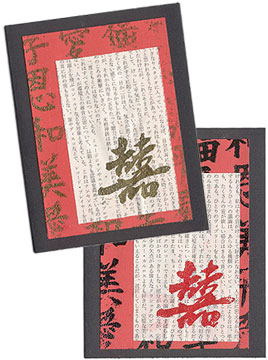
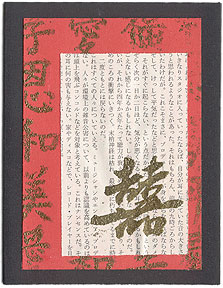
 Let’s start with this simple card. I used black cardstock, red cardstock, and a piece of asian text paper. My embossing is black characters on the red cardstock, and a red character on the text paper.
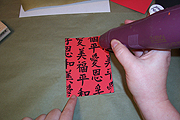
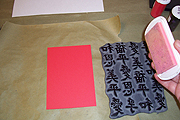
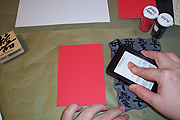 First, position the red cardstock on a larger piece of scrap paper, then ink up the background stamp with black pigment ink.
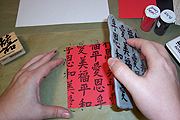 Stamp the background on the cardstock, then quickly set aside the stamp and open the black embossing powder. There is a very short working time for applying powder.
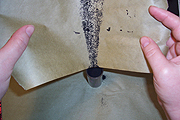
 Pour the black powder over the stamped image. This is not a time to be neat! Just get the powder onto the surface quickly, making sure you cover all the inked areas. Better too much powder than not enough, because too much can be knocked off in the next step, but not enough cannot be remedied.
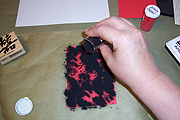
 Now it’s time to remove the excess powder, which is done by simply turning the cardstock on its side, and tapping it on the scrap paper. Any powder that has fallen on a non-inked area will simply slide off the cardstock, leaving powder behind only where it has been stamped.
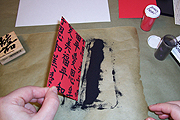
 Set the scrap paper and excess powder aside, well out of the way, and heat the cardstock with a heat tool. It will take a few seconds for the tool to heat up, but you’ll be able to see the powder melt when it’s hot enough. Keep the gun moving back and forth slowly, watching the powder to be sure that all of it melts. I usually go back and forth across the surface, then up and down. Set the hot piece aside for a moment to let the resin set up and solidify. Do not stick your fingers into the embossed area right now, or you’ll burn your fingers!
 Fold the scrap paper towards the center, and gently pour the excess powder back into its container for use on your next project. Even though I usually dump most of the container onto each project, the majority of the powder is tapped off. One container of powder lasts quite a long time.
I should probably say a few words about stamps before we move on. Embossing is best done with stamps that have larger solid areas and broad features. Photorealistic stamps with lots of detail aren’t really the best stamps for embossing, because when the resin melts, some of the detail is lost. This is best illustrated by trying it yourself—just ink up your favorite detailed stamp, stamp it on a piece of scrap paper, and emboss it. Very often, the result will be disappointing.
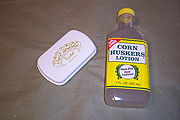 OK, let’s talk about embossing pads. Most embossing “inks” aren’t really ink at all—they’re simply binder. Several brands use glycerin as their binder, and when the pads dry out, they can be refreshed with a mixture of glycerin and water. I had a hard time finding glycerin at my drug store, so I simply purchased a bottle of Corn Husker’s Lotion, which is mostly glycerin and water, with some fragrance mixed in. A little dollop on my dried up pad, a few spritzes of water, and a little rubbing into the foam refreshed my dried up pad nicely.
 This card was made using the same cardstock and text pages with a glittery gold embossing powder. I don’t usually enjoy working with glittered powders, because the little glitter flecks get everywhere, no matter how neat I am, so most of my powders are matte solids. I’ll have to use some embossing ink for this project, because I don’t have any gold pigment ink. Although it’s not required that inks and powders match, there’s sometimes a little bleed through of ink color when the resin melts, and there are also sometimes areas that dry too quickly to catch any powder, leaving the ink bare. For this card, I’d prefer not to see any black pigment ink.
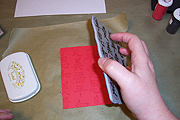
 Stamping with a clear embossing pad is exactly like stamping with ink. Just tap it onto the stamp’s surface, wetting the stamp evenly.
 Once stamped with embossing ink, the image is barely visible as wet spots on the surface. Powder up quickly!
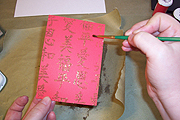 With glittery powders, there is often some excess that refuses to shake loose due to static cling. While there are products you can rub on the surface prior to stamping to prevent this static, I prefer to simply flick the excess powder away with a soft paintbrush.
Heating images stamped with embossing powder is the same as with inks—just heat the surface evenly, making sure all the powder dissolves.


