
 I have some coffee filters I’ve aged by staining them with instant coffee. They look great, they smell great—now, what do I do with them? One very simple thing to make from coffee filters is a book. The cone-shaped filters make little pockets, which can hold letters, tags, cards, ATCs, or anything else you’d like to tuck inside. Here’s a quick lesson:
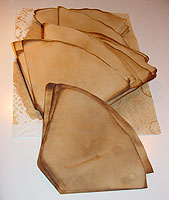 First, start with a pile of coffee filters. You can use them right out of the package, or follow these easy instructions for staining them with coffee. Figure out how many pockets you’d like your finished book to have, and then make yourself a stack of that many filters. You’ll see that the filters have one side that’s a simple fold, and another side that’s rippled, where the cut edge has been stamped closed. Make sure all your stamped edges are to the left in your stack—this will be the edge that is bound between the covers. Set the stack aside.
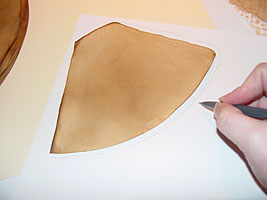 Trace a pattern around an extra filter. Cone-shaped coffee filters aren’t symmetrical, so your pattern won’t be, either. Leave about 1/4 inch extra around the top, right side, and bottom of the filter. Trace right against the edge of the left side.
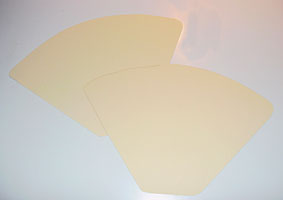 Cut out two filters from cover stock. I used lightweight bristol stock for this cover, and I thought it was a little flimsy when I was finished. Maybe two layers would have been better, or some heavier cardstock.
 Clamp the covers to the stack of coffee filters. I usually do this with kitchen chip clips—they’re inexpensive, and usually have a clear rubber protector that keeps the work from being scarred when clamped. I’ve clamped here on the top and right side—always use more than one clamp.
Punch holes along the spine of the book. I use a leather punch with an adjustable hole size for this. Since the holes are simply for stitching, I use the smallest setting. I did lay a ruler down and make a few marks so my holes would be somewhat evenly spaced. I ended up with nine holes spaced about 1/2 apart.
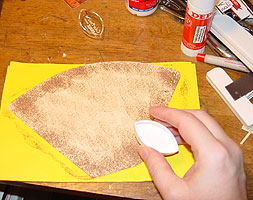 Now is a good time to do some decorating. I’m not really sure what I’ll be doing with this finished booklet yet, so collage or stamping is a little premature—but I can’t just slap solid covers on it! A little aging with some Colorbox Cat’s Eye chalks made the solid cover look more in tune with the stained coffee filters.
Once I’ve finished decorating, it’s time to assemble my booklet. This is as simple as it can be: place one cover on top of the stack of coffee filters, another on the bottom of the stack, and stitch through the holes. I did a running stitch starting at the top hole, down to the bottom, and then turned around and came back up to the top, tying my ends off in a knot, with long tails that will accept beads or charms later. I chose some hemp twine for this, but just about anything can be used for the stitching: linen threads, fibers, embroidery floss, yarn.


