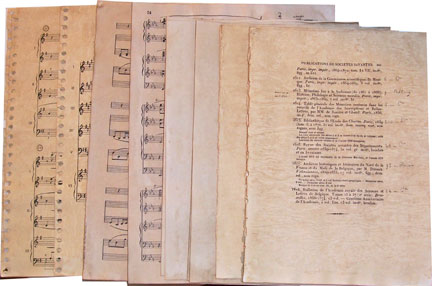
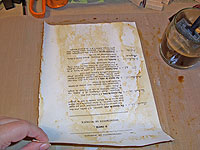
I’ve written previously about using coffee to stain coffee filters, but this week, I really needed to deeply tone a variety of different papers:
I really needed all these papers to look like they had been living in the same book for several hundred years. They were just too bright, too white, and too new-looking. A particular problem was a very white paper that I think was photocopied with an old typewritten bibliography, along with some handwritten notes. I thought with ageing, the obviously photocopied handwriting might be a little more convincing.
Ageing with coffee or tea is a pretty simple way to tone papers. I usually choose coffee over tea, because I really drink the tea I have, while I don’t drink coffee. I keep a bottle of instant coffee crystals in my kitchen for art purposes—and one large bottle has lasted me a really long time, since the expiration date on it is in 2005.
I usually start by filling a coffee cup halfway with water, and microwaving it for a minute. That heats the water enough to dissolve the coffee quickly. I use about three tablespoons of instant coffee, which makes a thick, dark brown liquid. I can always thin it later with a little water if I find I need a lighter color.
 This is not a particularly speedy process, since I work one sheet at a time. In theory, I think I could toss a stack of papers into a tub of coffee liquid, then remove them individually for stacking, but I’d probably end up with a big pulpy mess in reality. Besides, there’s something really calming about staining sheet after sheet with nicely scented coffee water…
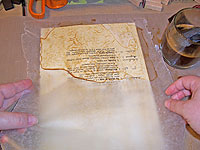
Anyway, I start by placing a sheet onto a waterproof surface. Tim Holtz was nice enough to slip me one of Ranger’s Teflon-coated craft sheets a while back, and it works just fine. A sheet of thick plastic like a heavy trash bag would also be a good work surface.
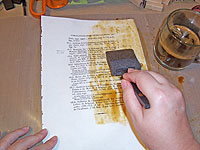 Use a sponge or a sponge brush to wipe coffee over the paper. Just work wet enough to spread the coffee around without pressure. Don’t get it so wet that the paper gets soggy. Work quickly, and try not to leave any white spots.
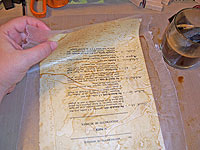
 Gently lift the wet paper by the corners, pulling it up gently.
 Flip the paper over onto the waterproof surface. It’s probably wet on the reverse side already. That’s OK—in fact, it’s good, because those wet parts have already started to stain. This will add to the uneven surface appearance when it dries.
 Add more coffee to stain this side of the paper. Don’t work too wet—just enough to drag the stain easily over the surface, without making the paper soggy.
 OK, now for the fun part. It’s time to lift the paper and move it to a drying area. I dry in stacks, with a sheet of waxed paper or plastic in between. I add this both to keep the wet papers from sticking together, and to add texture.
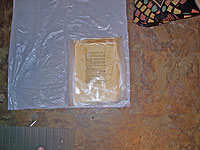
Tear off a sheet of waxed paper or plastic larger than your sheet of paper. Lay it over the wet paper. It should suck right down onto it, and create some blotchy texture immediately. Don’t smooth or press. Just let the dampness do the work of creating a good contact between the two.
 Now, reach under the top corners of the cover sheet, and lift the wet paper, pressing it back against the wax or plastic. Now, you should be able to lift both easily, with no danger of the paper tearing or turning into a soggy lump.
 Stack papers on their cover sheets in another area. I usually do this on a sheet of plastic on the floor, which the dog just loves, because it gives him something new to sniff. Just make a big layered pile of paper, cover sheet, paper, cover sheet. Those sheets of waxed paper or plastic will keep the sheets from sticking together, and will give texture to both sides.
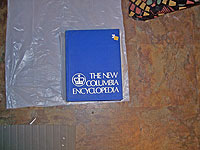 Place a waxed paper or plastic cover sheet over the last piece of paper on the pile, then weight it to dry. This is a really good excuse to own one big, heavy oversized dictionary—it makes a perfect weight for paper drying.
I let my papers dry overnight. A few were damp the next day, so I just fired up the iron, and pressed them each between two layers of light cotton muslin. Flat and crisp!

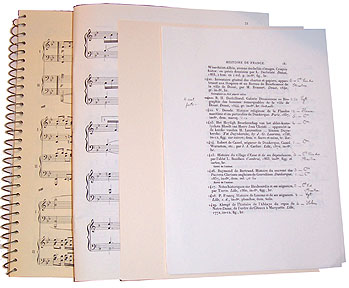
My finished papers, looking quite old and grungy. They’ve since been cut down and sorted into a new book, and now look like they belong together. Yay!
Bonus: they smell really good.


