If you’ve been working in altered books for any time at all, I’m sure you’ve seen or even created your own niches. I like the effect, but very often, I feel the work placed into the niches looks somewhat forced. In order to keep items in place, we often glue them down within an inch of their lives, which sometimes deprives them of looking as if they’d fallen there naturally.
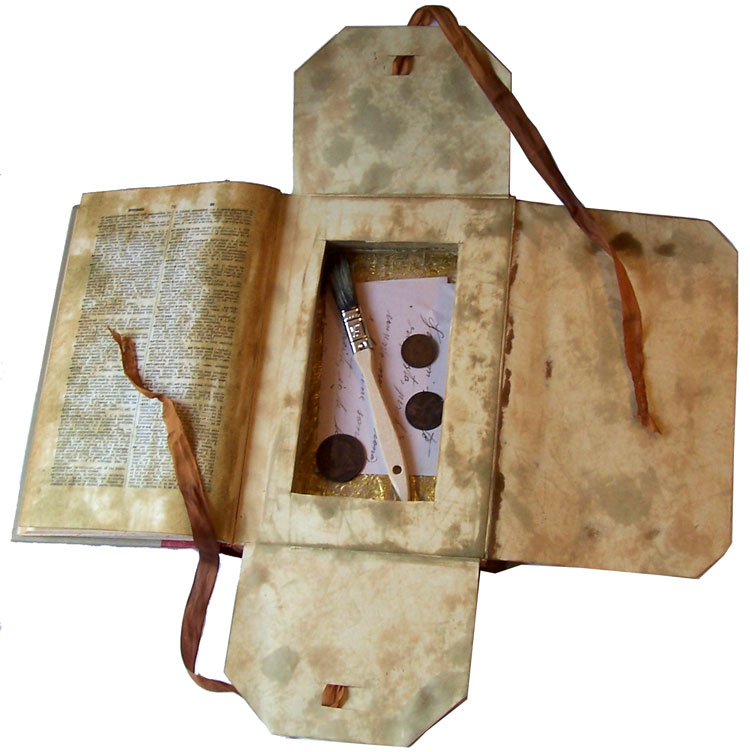
How do we get that spontaneous, natural look back? Well, one way is to not glue the items into the niche at all. What if we just let them rattle around in there loose, so that each time the book is opened, the viewer discovers the hidden treasures arranged as they fall naturally?
This niche effect is one I used in an altered book round robin that asked the participating artists to provide items for everyone in the project to use. I hid a pile of vintage photos in my finished niche, and the book came home with those photos incorporated into all the other artist’s layouts, and with many new goodies tucked into the niche.

Materials
To create this hidden niche, you’ll need:
- A hardback book with a sewn spine, at least 1½” thick
- Four sheets of heavy cardstock. I used ivory parchment textured cardstock.
- Tacky glue
- Plastic wrap
- Tape
- A craft knife
- A glue stick
- Inks to age the cardstock. I used Ranger Distress Inks in Antique Linen and Old Paper.
- About a yard of silk ribbon
- Decorative paper for the back of the niche
- Loose items to fill the niche. I just tossed in an old paintbrush, a vintage letter, and some old Italian coins.
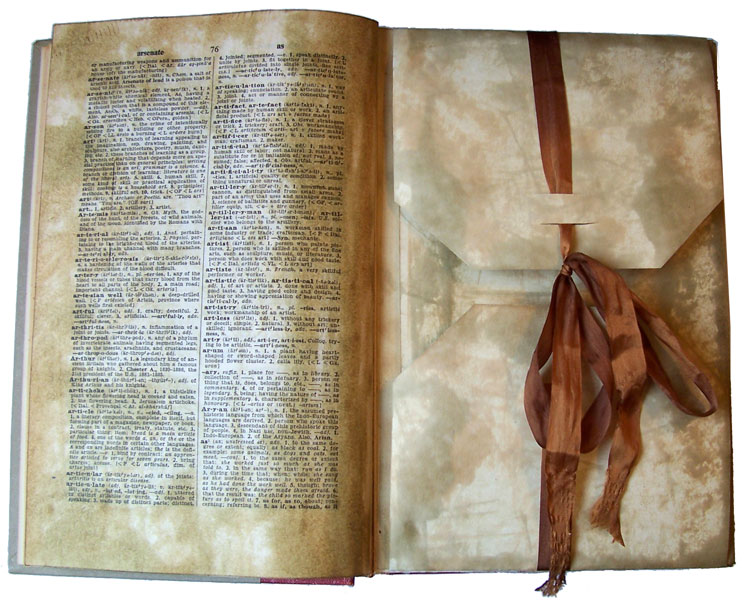
A few words about books before we start: I always use older books with sewn spines. This one happened to be a dictionary printed in 1957. Old reference books like dictionaries and encyclopedias are more likely to be sewn than glued, since they’re meant to last a long time.
Instructions
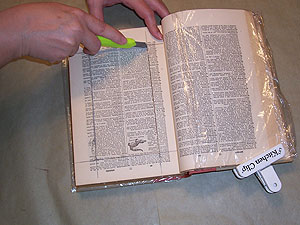
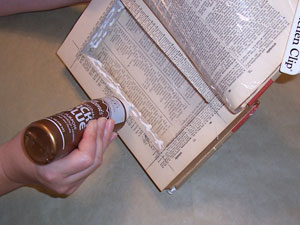
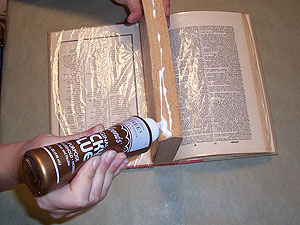 Apply Tacky glue to the sides of top, bottom and sides of your pages. Simply draw a line of glue, then smear it onto the edges with your finger. Close the book, weight it by piling other books on top, and let it dry overnight.
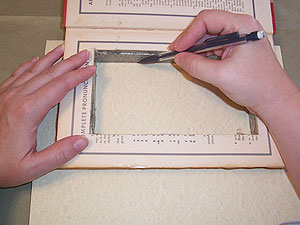
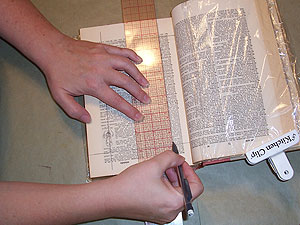 When the book is dry, draw some cutting lines onto the page block. I left about an inch around all sides, both for stability, and to allow room for me to glue my covers on later.
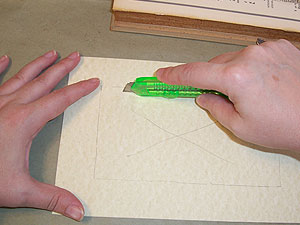
 Cut on the lines, using a craft knife. I used a ruler to get my cutting started, but set it aside after the first few cuts. The centers of the pages can be removed a few at a time until the whole niche is cut.
Take your time with this step. If your hands get tired, take a break. If your blade gets dull, stop and change it. I have a permanent scar on my left index finger to remind me of these things. Try to remember them without acquiring your own reminder!
 Apply Tacky glue to the inside edges of the niche, and smooth it with your finger. Be sure your plastic wrap is still in place, protecting the covers and extra pages. Close the book, weight it, and let it dry overnight.
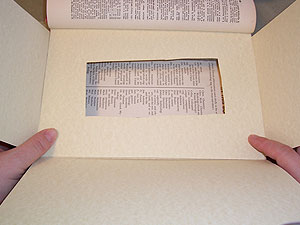
 When the book is dry, slide a sheet of cardstock over the niche, so it’s tucked into the spine. Flip the book over, open the back cover, and trace the outline of the book pages and niche.
 Cut out the cardstock along the outer edge, and remove the center section, leaving at least a half inch border—we’ll remove this later. Don’t worry if it looks lopsided. Finished books aren’t exactly square, especially if they’ve been well-loved over time.
Set this piece aside for now. We’ll use it after the flaps have been glued in place.
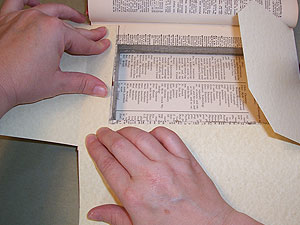
 Cut a piece of cardstock that’s the same height, but slightly wider than the pages. Fold the excess under, align the fold with the long edge of the book, and glue it in place. This makes the first flap.
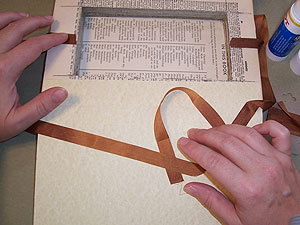 Cut your ribbon in half, and glue a piece to the top and bottom of the niche. Don’t be shy with the glue here, because these ribbons will be tugged about when the finished flap is tied and untied.
 Cut two pieces of cardstock half as tall as the book. Fold each one under about ¾” and glue to the top and bottom of the book, aligning with edges, to make flaps. Trim the corners of the flaps diagonally if you wish.
 Test fit the cut piece of cardstock you made earlier, to make sure the flaps will fold around it when glued. Trim if necessary, and glue in place.
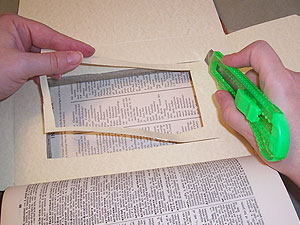 When the book has dried completely, trim away the excess cardstock from around the interior of the niche.
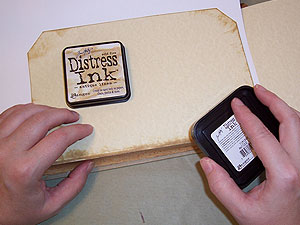 Age the cardstock with Distress Ink. Think about how this might age naturally, with more wear and tear around the edges, and where the flaps have been handled. More age might occur on the outer flaps than on the inner one.
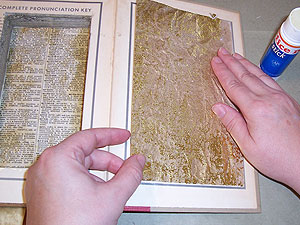 Glue a piece of decorative paper to the page behind the niche (mine was the inner back cover). This piece only has to be slightly larger than the opening of the niche. Glue the back of the page block over this piece, sealing the back of the niche closed.
From here, you can decorate and fill to your heart’s content. I went ahead and aged the page facing my niche, so it’s ready to decorate . I also cut two slits in the smaller flaps to anchor the ribbons down a bit, and aged the ends of the ribbons.
This article originally appeared in the September 2005 issue of The Monthly Muse.


