 Here’s the general idea: in the back section of my book, I wanted to add two rows of tiny bottles, which will eventually be filled with herbs and spices, and decorated. I really wanted to add this before working on the rest of the book, since I never know when I do complicated stuff like this whether it’s going to work and look wonderful, or just end up as a big mess. I always do niches or complicated cutting first—if it’s a big mess, there’s no loss other than the book I’ve used as a base.
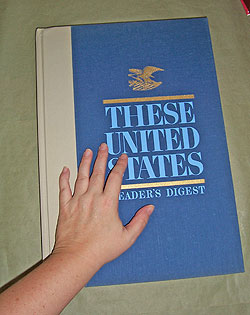 Here’s the book I started with—and yes, it’s huge. It’s an old atlas that’s about 16 inches tall, and 11 inches wide. I like working on big books like this, because I can do all sorts of crazy, broad things in them that little books don’t allow.
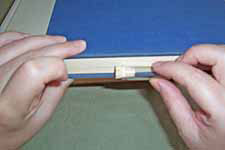
The important things about this book, other than its size: it has a sewn spine, and the pages are made of really heavy stock. If you’re not sure how to identify a sewn spine, try this article, which gives you an up close view of what to look for. A sturdy sewn spine is a must for the kind of cutting I have in mind—a glued spine will just fall right apart during the cutting process.
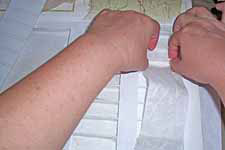
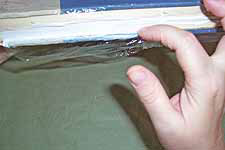 OK, now I want to mark off the section that will hold the bottles, and create a page block in which to cut my niches. I held one of my little bottles against the book to measure off the depth, and added some extra pages. Then I masked off the book with plastic and glued the block with Tacky glue. For a more detailed look at how to do this, try this article.
I set the book aside, weighted, to dry overnight before proceeding with any cutting.
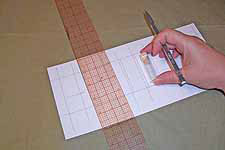 While the book was drying, I made myself a little cardstock template to figure out how large the niches would be, and where the dividers would go. I left a little finger room around each bottle, so they can really be removed from the book.
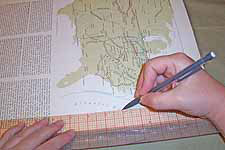
 When the book was dry, I drew in the blocks for the niches, leaving at least one inch of margin on all four sides. This allows plenty of support for the cut areas.
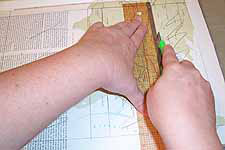
I cut, and cut, and cut, until my poor fingers ached. Even changing blades regularly didn’t help—there’s just a lot of cutting involved in this project. This step took me two days, because when the fingers get sore, I take a break.
 After cutting the two long niches for bottles, plus a big one down below for storage, I applied glue to the cut edges, weighted the book, and let it dry overnight.
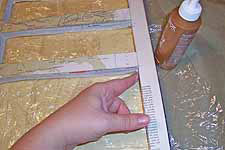
 To add dividers, I used craft sticks (also known as popscicle sticks), cut to the height of the niches. I slid the template underneath each niche, to use as a guide for gluing. This way, each divider remained straight, and was evenly spaced. The down side is that I could really only glue to the top and bottom of the niche, since the back of it was covered by the template.
 When the dividers were dry, I glued a piece of heavy cardstock on the back side of the page block to cover the backs of the niches. I decided to do this rather than gluing the whole thing down to the back cover because I’ll be covering the front and back covers with fabric, and want to finish the book inside first, so paint and glue won’t get all over it.
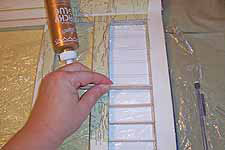
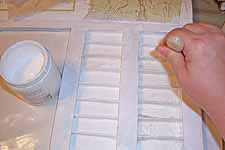
I glued the backs of the craft sticks down to the cardstock, which added stability to the niches. When the glue was dry, I applied a coat of gesso, since I’ll be working white papers over the top.
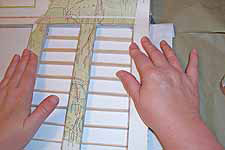
 Now, a little magic: the craft sticks and the niche become one now, by adding a long piece of mulberry paper applied with gel medium. I draped this carefully, tucking it against the craft sticks and the back of the niche, and when finished, the dividers looked like they were cut into the book rather than added later. Nifty, eh?
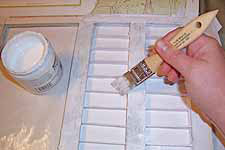
 Another coat of gesso completes the effect, filling in any holes and leaving a nicely primed surface to paint and decorate later.
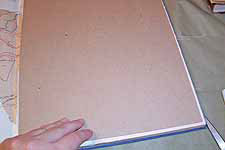 I try to create a sturdy cover for any niche that holds loose objects, because what’s the point of all that work if the treasures fall out? I glued a piece of chipboard between the previous two pages to create a cover, then added flaps at on three sides made from removed pages and cardstock glued to the back of the page block.
(Not sure why I’m removing pages? Try this article on preparing a book to be altered to find out why.)
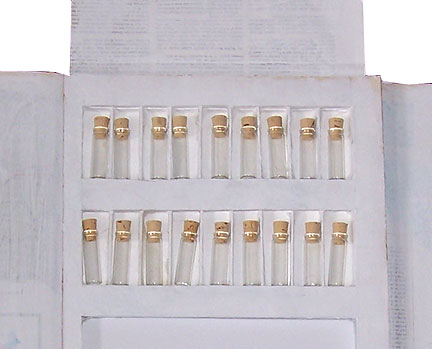
Here’s the finished result, ready for decorating:
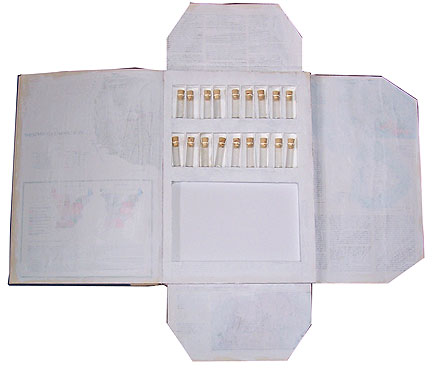
Here’s the niche section with flaps opened. The top, bottom and side flaps fold over the reinforced pages, and are secured with a piece of elastic, to hold the bottles in place while the book is being handled. When closed, it looks like this: