 What you’ll need:
2 sheets 8-1/2 x 11 inch cardstock
Standard hole punch
Scissors
Paper fastener (brad)
Glue stick
Collage materials, rubber stamps, markers for decorating
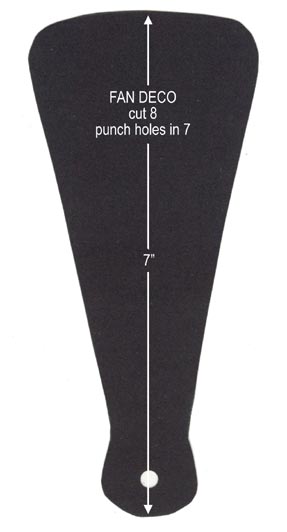
Copy of pattern, below. Try saving to your hard drive and printing from your favorite graphics software to get a full sized pattern in the dimensions indicated.
Trace the pattern onto cardstock, four pieces per sheet. Cut all eight pieces out. Punch holes where indicated in only seven pieces, setting the eighth one aside for the moment.
Decorate the front side of one piece of the fan. This will be the top section or cover. Use whatever you like: magazine photos, rubber stamps, your own drawings or journalling. This is your own creative deco, so have fun with it!
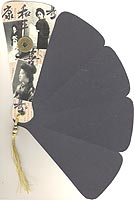
When your cover piece is dry, stack the seven punched pieces together, with the cover on top. Insert the paper fastener through the holes and bend back to hold pieces together. Fan pieces out and admire your work for a moment.
Flip fan over. The back side of the brad is showing, which isn’t pretty. Grab that eighth pattern piece, run a glue stick over it, and cover the back piece of the fan, including the brad. Now the fan is joined together tightly, but the brad won’t damage your envelope or other decos when it’s mailed.
If you plan on mailing your deco to other artists, you should add your contact information. I usually do this on the back side of the piece I’ve decorated. I include my name, email address, and mailing address, plus a list of my interests just for fun.
On this type of deco, I’d prefer that other artists only decorate the front face of the fan, and leave the back side black, so I can display all the lovely artwork at once when it comes home. I usually write “do not decorate” on the back side of each piece of the fan so they’ll know not to keep working once the front sides are filled.