
 Materials:
Ivory, white, tan and gold acrylic paints
Wide paint brush (mine was an inexpensive bristle brush from Home Depot)
White gift tissue, 2 sheets
Chunky stamp (mine was grapes and leaves from Back Street)
Paper plate
Green and purple chalk pastels
Scrap paper
Water
Sea sponge
Clear matte spray sealer
Plastic sheeting
How to do it:
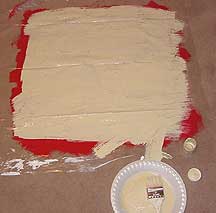 Lay plastic sheeting on your work surface (mine was my workroom floor). Be sure you put down a piece that’s larger than your tissue. Paint a square of ivory acrylic that’s slightly larger than your tissue onto the plastic. If you have some extra tissue, you can lay a sheet of it under your plastic to show you the correct size. (Note: See the red acrylic around the edges? That’s on the back side of my plastic. Sometimes, old colors will peel off on new papers, so it’s best to start with a clean piece of plastic. Don’t ask me how I discovered this—it was ugly.)
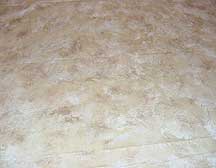
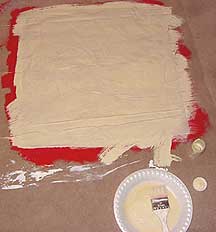 Immediately cover your painted square with a piece of tissue. Let it float down onto the paint, and then gently pat it with your hand. Don’t worry if there are little wrinkles or creases—we’re going to call that texture and say it was intentional. The paint might come through a bit and get onto your hands. If you don’t like that idea, you might want to wear gloves—I just wash my hands after this step. Dry bush a layer of paint over your damp tissue. Use a light touch, brushing or patting, until the paper is covered with paint. Immediately cover with another piece of tissue. Pat it in place with your hand just like you did with the first piece.
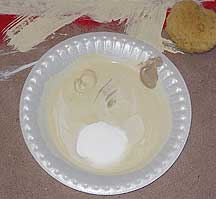 Squirt a little of each color of acrylic paint onto a paper plate, leaving some space between them. Add a little water onto the plate—don’t worry if the colors start to bleed into each other.
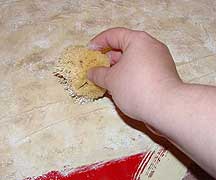 Wet the sea sponge with a little water until it’s nice and soft. Wring out any excess water—you don’t want to work too wet at this point. Dab the sponge onto the plate, picking up some paint. Kind of smoosh it around a bit so you pick up different colors of paint in different places. Pat gently onto the top layer of tissue, moving about randomly and squishing the sponge around to use all those colors you picked up.
 Keep patting the paper with paint, refilling your sponge whenever necessary. Once you’ve covered your paper, step back and look at it—if it seems to be more interesting in some places than others, just dab a bit more paint to add texture. Allow paint to dry completely before moving on to the next step.
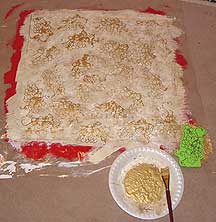 Squirt some gold acrylic onto a paper plate. Spread it around with a paintbrush. Dab your stamp into the paint and then press onto the paper. Don’t worry if the impression isn’t perfect every time—this is a very soft, impressionistic sort of look. Stamp randomly, filling the paper with pattern. Allow to dry completely before proceeding. Once the paper is completely dry, gently peel it from the plastic backing.
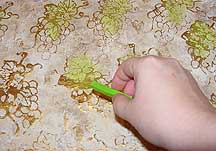 Rub green chalk over the leaf section of the pattern. Go right over the acrylic paint—the chalk won’t stick to it for long. Once you start to see color on the leaves, rub against the paper with your finger, spreading the chalk wherever you want to see green. Be gentle.
 Rub the purple chalk really hard onto a piece of scrap paper—you’ll see a little pile of purple dust build up. Dip your finger into the dust and rub it onto the grapes. Once you get used to these two techinques, you can make your chalking as bold or subtle as you wish. Once you’re finished chalking, give a quick spray of matte sealer to keep the chalks from rubbing away.


