 All of the samples shown were made using the same technique. For most of these, I used a solid background paper with a high cotton content. This is usually sold as resume paper in office supply stores. The cotton makes the paper absorbant, and also gives it plenty of tooth—a rough texture that allows it to accept things like pencils, pastels and chalks easily. I keep this paper around in both white and ivory, since it’s also the paper I like to use to reproduce vintage images.
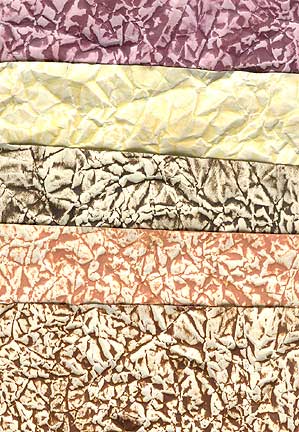
Other than paper, the only material required is an ink pad. I tend to have more dye inks than pigments, so that’s what I usually use. For these samples, I used (from the top) Ancient Page, Frescos, and three colors of Distress Inks, but any inks you have laying around will work.
Simply crumple a background paper into a ball. Straighten out the paper so it’s roughly flat again, and then crumple it a second time. This will produce a finer texture on the paper. Flatten the paper, then lightly drag your favorite ink across the surface of the paper. Don’t press down with the pad—just lightly drag it over the surface of the paper, repeating until you’re satisfied with the amount of color.


