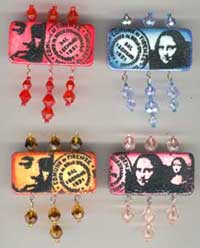
 I’m sure at some point, you’ve seen stamped dominos. These have been around for quite a while, and been discussed endlessly on email lists and in magazines. I think every artist who plays with dominos has developed her own favorite technique for making them cooperate, because although they are lovely when finished, they do tend to have minds of their own. This is the technique that seems to work for me.
Materials:
- Dominos – These can be found in white at Wal-Mart, and in ivory at Target, packaged in tins in the games section of the toy department
- Colorbox Cat’s Eye Chalk Inks
- Heat tool
- Rubber stamps
- Black ink for stamping
- Black embossing powder
- Diamond Glaze
- Paintbrush
- Pin backs
- E6000
- Masking tape
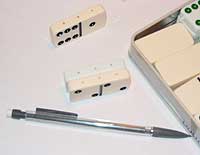 I’m not going to spend too much time on drilling holes, since this happens to be my own weird variation—but since I’m showing drilled pins above, I thought I’d show you how I get there. First, I draw holes on the side of one domino, making sure the spacing is even. Then, I use that domino as a guide, and draw marks on both sides of all the other dominos that will be drilled.
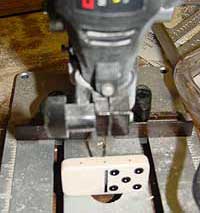 I drill using a narrow bit in my Dremel, which is set up with the drill press attachment. Yes, I know—that’s a lot of tools for one little domino pin. I happen to have all of them, so that’s what I use. I will say that if you want to drill through dominos, you’ll have to have some sort of drill press to keep your holes straight. Also, since small bits don’t come long enough to go all thw way through, you’ll have to drill from one side, flip the domino over, and then drill from the other side, praying that the two holes meet. Periodically, mine don’t, and there’s not much that can be done to salvage one that isn’t lined up properly.
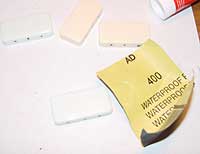 Once I’m done drilling, I do a little sanding. I sand the surfaces that will be inked with ultra-fine sandpaper in a circular motion. I think this particular sandpaper is 400 grit diamond paper from Home Depot—it’s just barely gritty at all, so there’s not a lot of abrasion on the surface. Some people bleach their dominos, but I usually can’t wait that long to prep them—when I’m ready to work, I’m ready to work right now. Once the dominos have been sanded, I wipe them with a paper towel to remove any dust left behind.
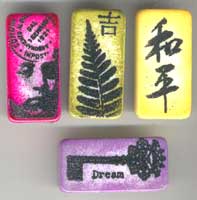
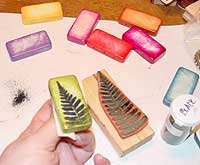
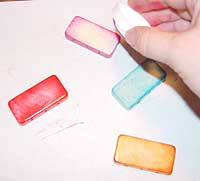 Now for the fun part: color! I’ve used several different ink pads on doms, and at the moment, my favorites are Colorbox Cat’s Eye Chalks. They’re small enough to work easily on the dominos, and the pads have a slight bit of texture to them if you work them lightly. To obliterate the texture, I just tap the wet ink with my finger—not the tip, because it leaves fingerprints behind. I usually ink the sides of each dom heavily, and go a little lighter as I move to the top.
 Remember this when you’re working with dominos: each time you apply color, you must immediately apply heat to set it. So, once the background is colored to your satisfaction, apply some heat. I usually try to do 30 second blasts to each top, and then do the sides. It’s kind of time consuming, but it takes a bit of time for the ink to set. The trick here is getting the surface warm enough to set the ink, but not so hot that you blister the surface of the domino. Don’t try to hurry this step along, because if your ink isn’t completely set, you’ll end up removing your background when you try to stamp on it, instead of applying a lovely design.
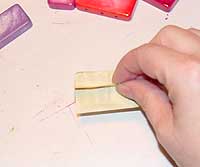 If you’re wondering how the heck you get color on the sides of the domino without smudging, or how you heat the sides without scorching your fingers, here’s the answer: make a little handle on the back side of each dom with a piece of masking tape. I usually tear off a piece, fold it in half to create the handle, and just stick two little edges to the domino.
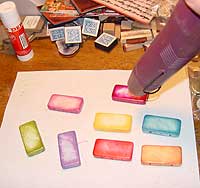
 Stamping on dominos is best done by laying the stamp on its back, and pushing the dom down on the inked design. I use Brilliance inks if I want to emboss, because they’re nice and thick. If I’m going without embossing, I use Memories ink. Push straight down on your domino, and then pull up using your handle to get a crisp design. Don’t feel like you have to run out and buy small rubber stamps for this—very often, a section of a larger stamp creates a lovely design that’s more pleasing than a smaller stamp.
What comes after color? Heat! If you’re embossing, sprinkle your design with powder, smack the side of the domino firmly on your table to shake loose all the excess, and heat. You’ll find it takes longer to get the powder to resolve than it does when embossing on paper. Don’t worry—just keep at it. If you’re not embossing, just heat set your ink. Remember it will take a little longer to heat set—better to heat it longer than smudge it.
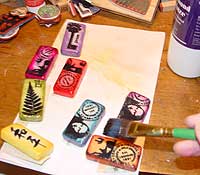 I seal my dominos with Diamond Glaze, which is quite shiny. I load up the glaze on a large, soft brush, and do one swipe across the face of the domino, and a quick brush around the edge. Don’t wipe back and forth with your brush, just in case you haven’t quite heated enough—the color will lift. Be sure to swipe your brush on a piece of white paper when you change colors of dominos—I caught just a bit of fuschia ink at one point, and I would have been disappointed if my next swipe had deposited it on my yellow domino.


