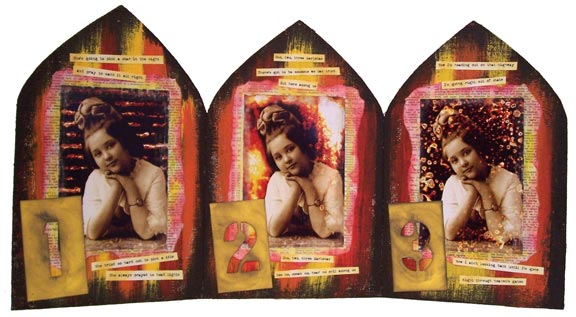

I’m working on a new book, on techniques for integrating photos with altered art and collage. After making three samples of simple bleach techniques, I decided to create a triptych to show them off together. The Three Marlenas, shown at right, was the result.
Now, for those of you who are wondering what the heck a triptych is, the dictionary definition goes something like this:
A work consisting of three painted or carved panels (especially an altarpiece), usually hinged together.
There are a lot of examples of triptychs in Medieval and Renaissance art, mostly religious in nature.
OK, enough cocktail party trivia—to make a basic triptych like mine, you’ll need:
- Three pieces of 8-1/2 x 11 chipboard. Chipboard is a packing material. If your local scrapbook store doesn’t have it for sale, reach underneath the sheets of loose paper, and you’ll probably find sheets of it. Ask if you can buy them. Alternately, tear the backs off paper pads—yellow legal pads are great for this, and usually for sale in big bunches at the dollar store.
- This pattern. Don’t try printing it from your browser—save it to your hard drive, and then print it from your favorite graphics software. It’s slightly larger than letter-sized, so it has to be printed on legal-sized paper.
- A craft knife and a ruler
- Wide masking tape
- Gesso
- Waxed paper
- Cheesecloth
- Cardstock to finish off the back – I used black for mine
- Paint, photos, ephemera for decorating your triptych
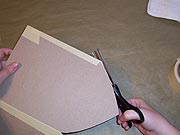
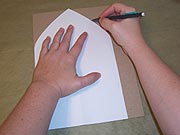 Print the pattern and cut it out. Trace it onto three sheets of chipboard. Cut out the pieces. I used a craft knife to cut mine, but some chipboard can be cut with heavy scissors.
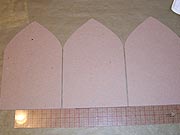 Line up your three pieces against a ruler, leaving a 1/8″ space between pieces. This space will allow your hinges to move freely.
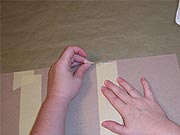
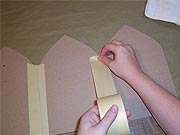 To create hinges, run a piece of wide masking tape over the gaps between pieces, connecting them together. Be careful to keep your pieces lined up against the ruler while you’re joining them, to keep your bottom edge even and flat.
 Flip your triptych over, and run another piece of masking tape over the gaps, wrapping around the bottom.
 Fold the hinges to trim the tape away at the tops. Just follow the line of the curve to trim.
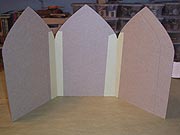 Stand your triptych up now, to check that it stands straight and square. If it’s wobbly, now is the time to fix it. Just remove the tape hinges, line up the bottoms against the ruler, and retape.
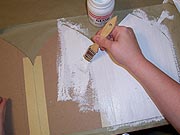 Paint both sides of the triptych with gesso. Paint the first side, let it dry for a few minutes, and then flip it over onto a piece of waxed paper, and paint the other side. It’s important not to let the first side dry completely before starting on the second.
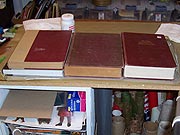 Let the second side dry for a few minutes, then put a piece of waxed paper on top of it, and weight the triptych with books and let it dry completely. This is to keep the pieces flat and straight—without the weight, they’re liable to warp.
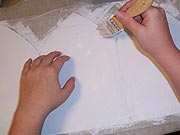 Paint a coat of gesso on one side of the triptych, and while it’s wet, lay a piece of cheesecloth over the top. Paint gesso over the cheesecloth. Flip the triptych over onto waxed paper, and fold the edges of the cheesecloth to the back side, painting with gesso to hold in place. You’ll have to clip between the panels to get it to fold around the tops. Don’t worry about being too perfect with this—the cheesecloth is just for texture, and a little more structural stability at the hinges. Cover with waxed paper and let dry completely.
Now, it’s time for your own personal magic. Paint your triptych, collage it, ink it—now that it’s covered with gesso and cheesecloth, it’s just like working on prepared canvas panels.


