
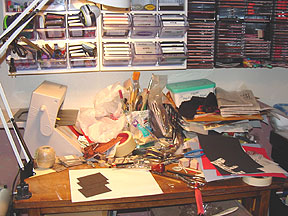
 Once again, my work table is exploding with scraps and leftovers. See that right corner? There are stacking trays under there that are supposed to contain my mess, but the pile has grown so large, you can’t even see them! It’s time to do something with all this stuff, but seriously, I just can’t bring myself to throw it all away. That means it’s time to find something useful to do with my extra paper bits—so today, I’m making scrap paper books.
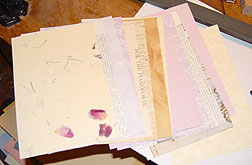
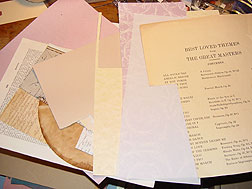 First, I sort my papers into some sort of order. For me, that usually means doing some sort of color story with them. This first pile is aged whites and off-whites mixed with lavenders—sort of a nice, soft vintage grouping. In the mix are a piece of a dictionary page, some parchment, pieces of scrapbook papers, a corner of an old map print, and even a stained coffee filter.
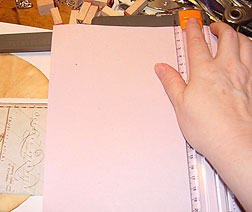 Now it’s time to cut. I usually sift through and find the smallest piece in my pile, and then cut the largest piece I can from it. In this case, the piece came to roughly 4 x 6 inches. Before cutting further, I decide which edge will be bound—in this case, I want to bind the short edge. Knowing this, I’ll cut my papers so they’re oriented properly, with text pointing the correct direction. I cut as many pieces of my chosen size from each scrap as I can, and throw the remains away.
 Here’s my pile of cut papers. I usually try to arrange them so that if there are two pages alike in the books, they’re not sitting next to each other. I also like to vary colors and textures—a glossy paper next to a handmade one, a lavender next to a natural. I choose a pretty paper for the top sheet, and usually try to place the heaviest piece of paper on the bottom, to support the book.
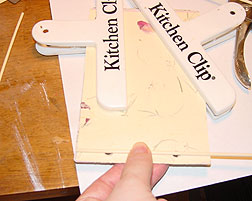
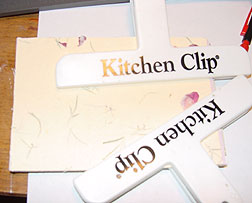 I clamp the book with my very high-tech clamps. I love using chip clips to clamp my work, because they usually have a little clear rubber ridge on the inside that protects the paper from being marked. These came from the dollar store, and have the extra added attraction of a magnet on the back side—I can hang them on my metal filing cabinet, where they’re easily accessible.
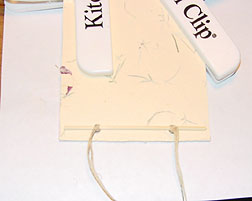
Once the book is clamped, I mark the top page for holes. On this book, I marked two spots roughly 1/4 inch from the side edge, and 1 inch from the top and bottom. Holes are punched using a regular hole punch from the office supply store. Sometimes, the paper is a little too thick to punch through all the layers at once, so I do a few sheets at a time.
 For my binding, I’m going to use a bamboo skewer and some hemp twine. First, I roughly measure my skewer against the book. I like to make the stick part of this binding just a tad shorter than the height of the booklet, but I’ve also seen them done with sticks hanging over the edges. I cut my skewer to the desired length using wire cutters.
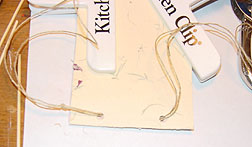 I cut two pieces of hemp twine, and knot them on one end, leaving tails in both directions. I slide the twine in one hole and out the other, letting the tails hang over the edges.
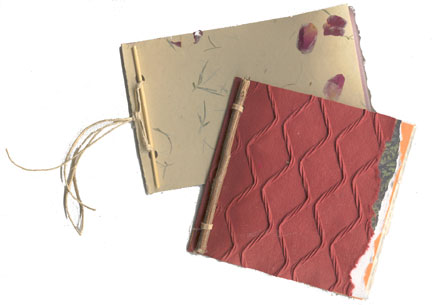
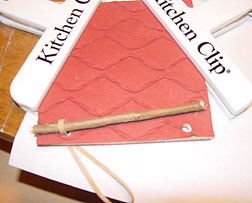
 I slide the skewer underneath the knotted twine above one hole, and pull it tightly against the skewer. Laying the skewer over the second hole, I knot the twine over it. This leaves me with a skewer snuggly anchored against my book, and all the pages held in place. On this booklet, I pulled all the tails together and knotted them again, and then trimmed them. If I know this booklet will be roughly handled, I’ll add a dot of glue to hold the skewer in place, just in case the twine loosens a bit.
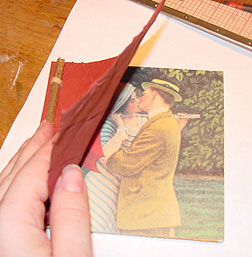
 I did a second book, in red/gold/blue/natural, heavy on the vintage looking papers and images. Same steps as above, but when it came time to add the binding, I chose a rubber band and a stick from my backyard. I slide the rubber band up one hole, and push the stick into the loop. Then I pull the other end of the rubber band up through the second hole, and stretch it over the opposite end of the stick. This creates a nice snug binding. Use your imagination with this style of binding. For sticks, try popsicle sticks, lollipop sticks, straws, twigs, skewers, cinnamon sticks, an old pencil or paintbrush. For ties, plain rubber bands, hair ties, ribbons, twine and fibers.
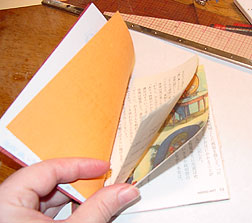
 Pages can also be made from anything. Here, I used an illustration removed from a book I was prepping to be altered. Think junk mail, newspaper, book pages, scrap papers, envelopes, tags—anything you have at hand can be bound into the book.
 Don’t feel you have to make all your papers exactly the same size. Sometimes, I’ll intentionally cut some pages a little shorter or narrower, or tear the edges once they’re bound into the book just for variety.


