How To Get 10 ATCs From One Piece Of Cardstock
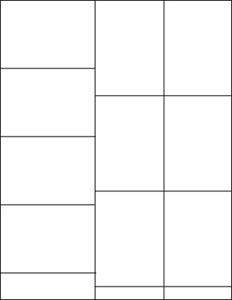
Getting ready to make some artist trading cards? Here’s a simple cutting diagram that will give you 10 cards from one sheet of 8-1/2 x 11 inch cardstock:
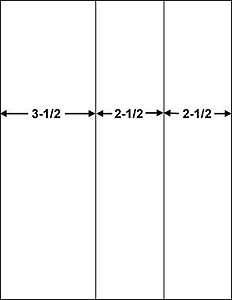
First, cut three strips from the paper lengthwise. One strip will be 3-1/2 inches wide, and the other two will be 2-1/2 inches wide. (Remember, the dimensions of ATCs are 2-1/2 x 3-1/2 inches)

Next, cut four 2-1/2 inch pieces from your 3-1/2 inch strip. Cut three 3-1/2 inch pieces from each 2-1/2 inch strip. You’ll have just a tiny piece of waste at the end of each strip.

You should now have 10 perfectly sized cards from one sheet of cardstock.
Tips
Using a paper trimmer instead of scissors makes cutting ATCs a much easier and cleaner process. Fiskars makes several models readily available in craft stores, Wal-Mart, and most office supply stores.
If you usually use plain white cards as your backgrounds, go ahead and cut up half a dozen sheets of paper at once, so you’ll have a stack of backgrounds ready to go next time you’re inspired.
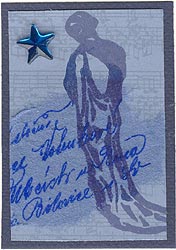
I like to frame my cards with a solid color, like the House of Blues card shown here. To do this, I cut my solid 2-1/2 x 3-1/2 inches, and my white background cards 2-1/4 x 3-1/4 inches. The same cutting method can be used with the smaller dimensions to get ten cards from one sheet. Just remember to keep your smaller cards in a different pile!
Jul 26th, 2008 at 1:47 am
You probably thought this was almost too basic to post, but I’m glad you did. For the life of me I couldn’t figure this out on my own, I always had a lot of waste when I cut up my cardstock but now I don’t.
I like to use a whole sheet of cardstock and paint and glue a background on it before cutting it, now I don[’t wast any of my “artwork”
I like the idea of using 2 cards to make a border, it will make the ATC much sturdier also, when I ever get down moving I’m going to try that technique out.
Jul 27th, 2008 at 12:13 am
Thanks Lisa. I cut these out last night and made a couple of ATCs. The little piece left over makes a nice “bar”. I mounted this about half inch up from the bottom which separated the artwork from the title of my piece - so voila - nothing wasted. Love your site. Have been a member for some time now and always look forward to and read your weekly musings. Have gained lots of inspiration when I have a blank momenet. Thanks so much for making this a free site. You are fantastic.
Jul 27th, 2008 at 1:40 am
This is terrific! I’m going to try my hand at ATCs for the swap at the International Quilt Show in Houston this fall. I thought I would need to buy the cards somewhere, and supplies like this are scarce locally. I’ll definately try this, and it gives me a good excuse for buying that paper trimmer I’ve had my eye on!
Jul 29th, 2008 at 3:52 pm
This was a great reference for those of us who never read patterns or diagrams, can’t even imagine how many “extra” ATC’s I have salvaged with #10!!!
Jul 30th, 2008 at 8:34 pm
wow- great help here. I was using blanks ordered from eBay but they are expensive and sometimes I think they are too thick. I’ll cut up some cardstock now. -Much less expensive!
Aug 2nd, 2008 at 6:21 am
I too am guilty of ordering my cards because of my inability to cut straight..no mas!