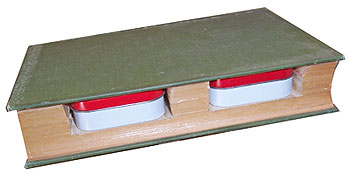
 I put two Altoid tin drawers into this book about two years ago—but never finished the book. I have a lot of that going on in my workroom. There are piles of unfinished pieces, especially altered books. That doesn’t seem to keep me from starting new ones regularly.
To create a book like this, you’ll have decide what to use for drawers. My reccomendation is something that’s pre-made, like candy tins or matchboxes, rather than attempting to create drawers on your own.
You’ll also need a book that can accomodate your drawer choice. Some people choose the book first, and then select drawer pieces that fit. Others want to make drawers from specific items, and choose a book that gives the room to work with that choice. This “which came first” choice is up to you.
Matching up your book and drawer choice is pretty simple: you want a book that’s tall enough, wide enough and deep enough for your drawer, plus some extra for ease, plus whatever extra pages you’ll want to decorate. Some drawer books have no decorated pages, and some have the drawer blocks in the front or back of the book, with lots of pages decorated. Again, the choice is up to you.
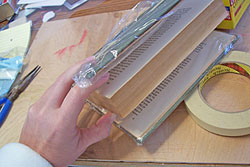 Once you’ve chosen where your drawers will be placed, you’ll create a page block, just like you would to create a niche. I have a step-by-step lesson on creating niches posted here. You’ll want to mask whatever isn’t included in your drawer section with plastic, and do the edge gluing and weighting to dry parts. That will give you what’s shown here—a solid page block that’s slightly deeper than the tins that will become the drawers.
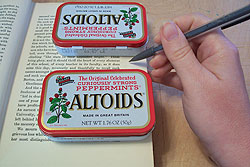 Now, you’ll want to mark drawer placement on the block, to prepare it for cutting. I positioned my Altoid tins, then did a little measuring to make sure I was leaving roughly the same margins above and below them. When cutting, I find it’s best to leave at least an inch above, below and between drawers. This allows for some innacurate cutting, and leaves a block that’s still pretty stable.
Altoid tins are larger at the top than they are at the bottom, so please don’t just trace the bottom of the tin for this step! It’s best to leave just a little ease, so the drawer will slide easily. Too much ease, and they’ll fall out every time you tilt the book. Not enough ease, and they won’t slide at all. This is something you can figure out as you go—you can always cut a bit wider if the niches are too narrow, but once you’ve cut them too big, it’s a pain to size them back down.
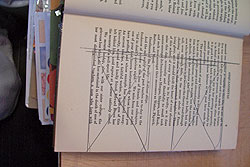 Because I’m prone to cutting the wrong things, this is how I mark my niches. Whatever is XXd out is what will be cut away. Whatever isn’t stays.
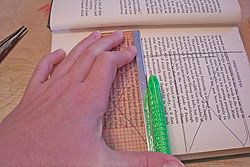 Now, it’s time for endless cutting. I really find cutting niches very tedious, so this part might happen over the course of several days. Unlike niches that will show, these drawer niches don’t have to be perfect—raggedy cutting of corners is fine, especially since the Altoid tin corners are rounded.
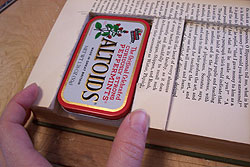 Here’s a little test fit of the first drawer. Notice that I’ve cut the niche slightly deeper than the tin.
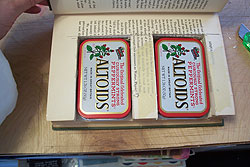 Here’s another test fit, with both drawers in place. Try to cut both niches the same depth for a neater look.
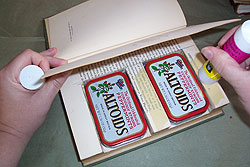 Now, a little something to cover the top. I glued half a dozen pages together to create a lid, and glued that down over the niches. Sometimes, I use the book cover for this instead. It’s important that you use something more than just a single page, since this is going to take some wear and tear.
Where you go from here is up to you. You’ll find a lesson on prepping tins for altering here. You can paint the tins—try not to do anything too goopy, and always seal with a glaze to make sure they continue to slide. You can burn the tins and leave them bare, or color them with alcohol inks, which I describe here.
To add handles, I usually just drill two holes in one side of each tin, and add either wire or twine loops. I’ve seen drawers with buttons glued on the side—I tend to be wary of gluing anything that’s going to be yanked on, but wiring them in place through drilled holes would work for me.
What happens if you cut your niches too wide or deep, and the drawers keep falling out? Try applying a little strip of self-stick foam along the front edge of each niche, or lining the entire bottom. Alternately, you can apply it to the bottom of the tin—not as graceful a solution, but infinitely easier.

