 About five years ago, I took a two hour class on silk paper making from UK artist Kath Russon. In two hours, I made half a dozen totally cool sheets of paper and a silk paper bowl—and then promptly forgot about this skill, because the supplies for it were far too expensive.
A couple of weeks ago, I received a challenge packet in the mail from Leandra at Paper Artsy, also based in the UK. In it was a handful of lovely purple fibers—-fibers that I hadn’t played with for five years. I knew immediately that I had to scrape together the supplies to give silk papermaking another try.
One of the reasons I dragged my feet about doing this for so long was the cost of getting silk or any other type of fun fibers here in the US. However, with the increased interest in knitting and spinning has come a wealth of suppliers who stock all sorts of fibers, including silks, cottons, flax and hemp. These fibers will all work with this technique, giving slightly different qualities and textures to the paper. This is one of those techniques that calls for experiementation. Fortunately, Kath wrote a really excellent book, Handmade Silk Paper, that gives a generous description of all types of fibers, how to dye them, how to work with them, and what qualities they’ll give to the finished paper. If the general overview of the technique I’m posting here interests you, buy the book—there are all kinds of cool tricks and techniques in it that will help you make beautiful papers, and dozens of brilliant examples of finished papers that will inspire you.
To make your papers, you’ll need:
Fibers – For these papers, I used silk roving and flax tops, plus some assorted dyed fibers laying around my workroom. Fabulous fibers can be found for reasonable prices at Mielke’s Fiber Arts.
Plastic screening – I used replacement screening, purchased by the roll from the hardware store. Be sure you get plastic, and not wire.
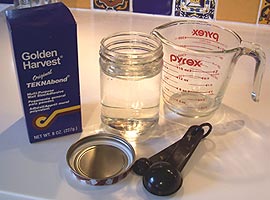 Wallpaper paste – Kath’s technique uses methyl cellulose paste. I had a hard time finding it here in the US. I did find Golden Harvest Teknabond, which is a starch based paste, and feels pretty close to the same thing. Do not try this technique with wheat paste—it’s not the same thing. I mixed 2 tablespoons of paste to 2 cups of water, and it came out the right texture.
You’ll also need plastic sheeting, newspapers, measuring cup and spoons, a jar to hold your paste, some hangers with clips for drying, and whatever inclusions you’d like to throw into your paper—things like floss, dried flowers or leaves. grass, glitter. Whatever you think your paper needs.
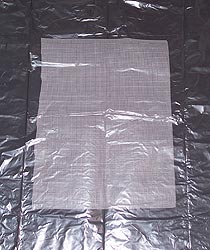 Here’s the setup for papermaking on my workroom floor: A couple of layers of newspaper, covered by plastic to protect the floor—this is a really messy, gluey technique, so be sure to use the plastic. Over the plastic is a layer of plastic screening. I cut mine in a couple of sizes: some that’s slightly larger than letter sized paper, and some that are about the size of a quarter sheet or a little larger. The larger pieces are for full sheets of paper, and the smaller ones are for little accent pieces. I like the raggedy edges of these papers, so I tend to make them to size rather than making them large and cutting them down.
Be sure to cut your screen pieces in pairs—you need two pieces roughly the same size to make these papers.
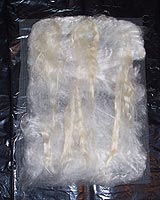
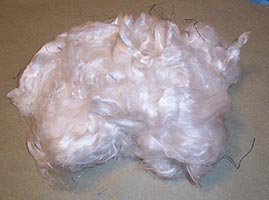 This lovely wad of fluff is silk roving. Roving is fiber that is ready to spin. Silk roving has really long fibers, so it’s great for big sheets of paper. Cotton has really short fibers, so cotton roving is good for smaller pieces of paper, or for combining with a longer fiber. We’ll talk more about layering fibers in a minute…
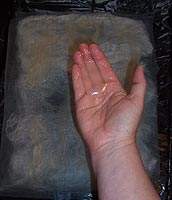
How does this ball of fluff turn into long, flat paper? Well, there’s some pulling involved, to flatten out the fibers. Then, there’s some spreading, to get a nice, even layer of fibers with no clumps.
 After some pulling and spreading, you end up with something that looks sort of like this. I try to keep my layers of fibers somewhat directional—so, these fibers are running across my screen, to create a base. The fibers are pretty fluffy—don’t worry too much about this, because they’ll get flattened out shortly. The goal is to build nice, even layers with few holes—something I need to practice a little more.
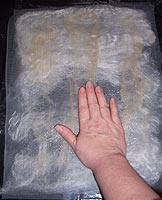
 Here, I’m building up another layer with flax tops, which are a light tan when undyed. This layer is running up and down my screen. Again, the goal is usually to get a nice, even layer of fibers with no holes—well, unless you’re looking to make striped paper, which is what I’m going to end up with here.
 Now for the fun part! On top of my piles of fibers, I place a second piece of plastic screening. Make sure it covers all your fibers—if not, tuck them in a bit. I’ve mixed up my paste according to the instructions (which require it to stand for about 10 minutes—don’t skip that part!). The paste is kind of thick and a little gummy, but you can see it’s somewhat clear—it will dry almost completely clear.
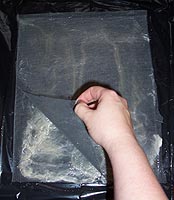
Pour some paste onto your hand, and…
 …moosh it onto the screen. You’re pushing down with the paste, because it has to get all the way through the fibers. Cover the top completely—you can sort of see your fibers flatten out and get shiny as they accept the paste. When all the fibers look nice and wet, flip the whole screen and fiber sandwich over, and repeat the paste mooshing from the other side. It doesn’t have to be soaking wet, but all the fibers do have to be gluey.
 When the fibers are all wet with glue, peel off one layer of screen, leaving the fibers on one layer. This is important: the layer of screen remaining will leave a slight grid pattern on the finished paper. If you like this, and want it to be the front side of your paper, make sure that it’s against the remaining screen. If you don’t like it, make sure the finished face of your paper is not against the screen.
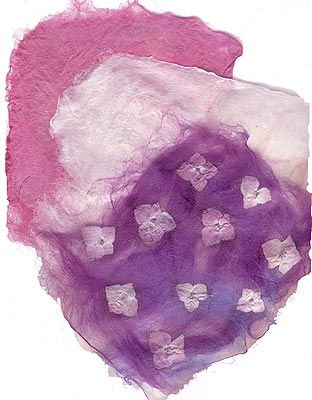
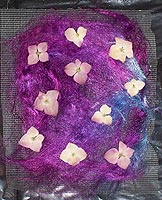 Here, I’ve peeled back one layer of screen to add some inclusions to a piece of purple silk paper. I scatter some dried hydrangea flowers, then replace the screen and apply more paste to stick them down. Since I don’t want a grid on my finished paper, I peel the layer of screen that’s right against my flowers off for drying. If I wanted a grid on my flowers, I would flip the screen sandwich, and peel off the back piece of screen.
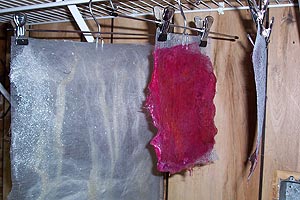 These papers are hanging out in the garage to dry. I’ve clipped skirt hangers to the screen, not to the fibers—otherwise, there will be hanger marks on my finished paper. The paper takes anywhere from a few hours to overnight to dry, depending on how much paste is used, and how dense the fibers are. There might be just a tiny bit of paste dripping at first, so be sure to protect the floor.
Once the paper is completely dry, simply peel the remaining piece of screen away from it. If the paper buckles a little, press it flat with a warm iron.


