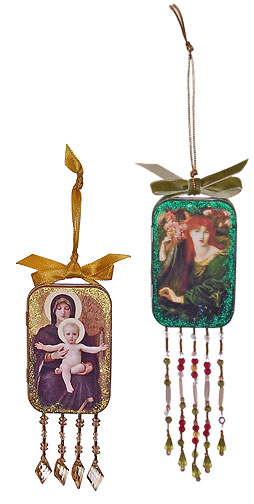
 In the September 2007 issue of The Monthly Muse, I did a set of Altoids tin ornaments that required drilling to add hanging loops and dangles. While shopping at my favorite home decor store this week, I found a bunch of beaded trims marked 50% off. I decided to make another pass at Altoids tins, to see if I could create a similar ornament without any drilling. Here are the results:
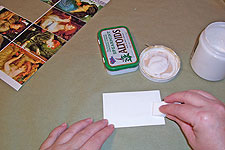 I used images from some of the Metal Tin Sheets from Ten Two Studios, which are sized for Altoids tins. I chose tins and images to go with them—remember, Altoids now come in quite a few flavors, each with their own uniquely colored tin. I applied a light coat of matte medium to both the top of the tin and the back of the image.
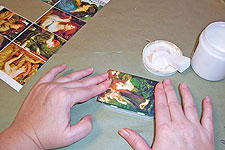 Working quickly, while both were still wet, I pressed the image onto the top of the tin, smoothing it from center to outer edges.
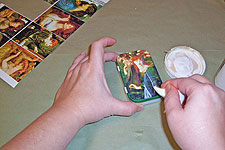
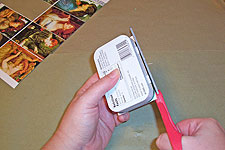 While the medium was still wet, I trimmed away any excess image that was hanging over the edges of the tin.
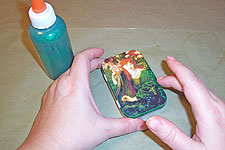
 Right after trimming, while the medium was still damp, I applied another coat over the top of the image, paying particular attention to the outer edges. Making the image wet on both the top and bottom will help diminish rippling, and sealing around the outer edges will keep it from peeling away later. Now the tin can be set aside to dry completely.
 I like a little glitter on my ornaments, so I applied a bit of glitter glue around the outer edges. I like to apply it by patting it on with my finger rather than squirting it directly onto the piece. Once again, the tin can be set aside to dry completely.
 I used some lovely beaded trims on the bottom of the tins. I purchased 1/8 yard of each trim, and I think I have enough to do two or three tins from each piece—it just takes a few inches for each one. Although these trims are very expensive, I paid less than a dollar for each 1/8 yard piece, so maybe 30 to 50 cents per tin. I can live with that!
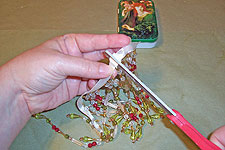 To cut each piece of trim to size, I applied a piece of masking tape to the ribbon or twill on which it’s based, wrapping it around the front and back. This will hold any anchor threads in place while cutting and gluing. Just cut through the tape to make a clean edge.
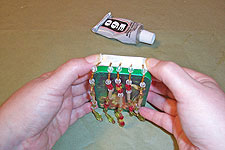 I applied some E6000 to the ribbon or twill, and pressed the piece onto the bottom of the tin, lining up the unbeaded edge with the back, so the beads hang in front. This glue has to dry completely before we can move on.
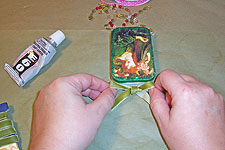 To cover up the area where the twill is glued to the bottom of the tin, and to provide a convenient place to add a hanger, I wrapped a ribbon around the outside of the tin, and tied it in a bow at the top center. A few dabs of E6000 hold the ribbon in place on the bottom and sides.
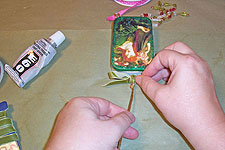 To add a hanging loop, I simply knotted another piece of ribbon or cord around the center of the bow. Alternately, a wire ornament hanger can be hooked into the bow’s center.
Fill your ornament with whatever you desire! Conveniently, Altoids tins are the perfect size to hold most gift cards. They can also be treated as pocket shrines, and filled with tokens and little bottles that are meaningful to you. You can also just leave the candies in the tin, or refill them with your own—but be careful to wash the tins well before you do this, because the oils used to make Altoids are very strong, and tend to flavor everything they touch.


