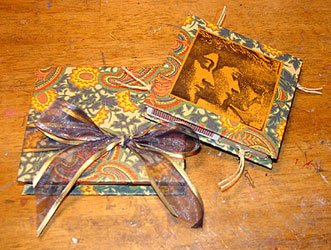
 I love playing with matchboxes! They’re a wonderfully inexpensive item that can be incorporated into all types of artwork. One of the things I like to do with them is use them as drawers in little books. Here are two examples of matchbox books: one that has a traditional book-like cover, and one that’s simply a square of drawers.
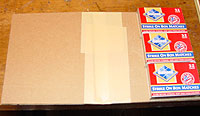
To make these books, you’ll need:
Matchboxes – 5 for the first example, and 4 for the second
Cardboard or book binder’s board, enough to hold the matchboxes
Wide masking tape
Bamboo skewers
Paper for covers
Glue – I use plain old glue sticks
A pencil and a ruler
Papers and paints to cover matchboxes
Needle and heavy thread for drawer pulls
Ribbon, stamps or whatever you wish to decorate
 For the 5 box book:
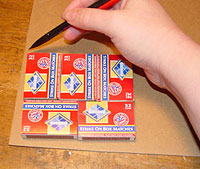
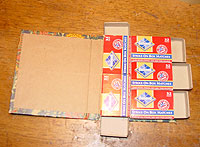
Empty your matchboxes, and line them up on a piece of board. I used heavy cardboard for mine, like the type that comes packed with bulk scrapbook papers. For this book, I’m choosing to have drawers come out of one side, the top and the bottom. Once you make a couple of these, you’ll see there are an infinite number of ways to position the match boxes—create your own ideal layout for your project. When you have your matchboxes in position, draw around the outside, leaving about 1/4 inch extra along one side and the top.
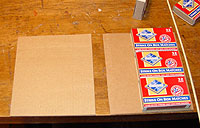 True up your lines with a ruler, and cut two cover pieces from your board. Find a place to line up the edges of your two covers for this next part—I used the edge of my work table for this.
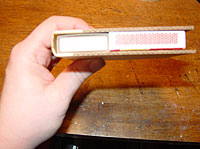
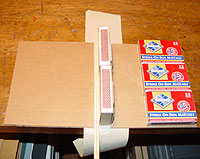 Now, let’s make a spine! Tear off a long piece of masking tape, and position it beneath the covers of your book. To get the proper spacing for your spine, you’re going to line up a few items between the covers: some matchboxes standing on their sides, and a couple of bamboo skewers. Press your covers down onto the tape, and then remove the skewers, and try closing the book. The covers should wrap easily around the matchbox—if not, place your covers back onto the table, lift one away, and move it further out. I like using skewers for this—if two skewers is too tight a fit, I add a third one for spacing, and that usually does the trick.
 Once you’re happy with the width of your spine, fold the edges of the masking tape toward the inside of the book. The spine will be just two layers of masking tape stuck together for the moment—don’t worry, there’s more support coming.
 Do one more check to make sure you’re happy with the book’s size and spine width. If it closes easily at this point, you’re on the right track. If it doesn’t, stop now, remove the masking tape, and rebuild the spine. This takes a little practice to get the right width, but once you get it, you’ll know it by feel for the next time.
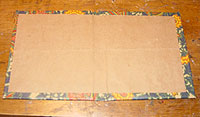
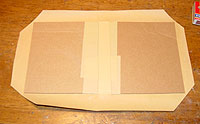 Lay a piece of your cover paper on your work table. For my book, I used some very heavyweight wrapping paper—it’s almost the weight of wrapping paper, but a little stiffer. Scrapbook papers will also work, but don’t mess with cardstock, or your cover will be bulky. Fabric might also work, but be sure to reinforce the exterior spine with something like a strip of leather. Position the book on the cover paper, making sure you have plenty of extra around the sides, top and bottom. Flip back one side of the cover, and apply glue stick liberally to the board and spine. Press down onto the cover paper. Repeat with the other side. Miter the corners of the paper. I trim mine closely, leaving paper the height of the board behind for folding.
 Apply glue stick to both the covers and the cover paper, and fold all sides inward. At this point, I usually open and close the covers a couple of times, smoothing any creases or wrinkles that appear.
 To finish off the inside of the book’s covers, cut a piece of endpaper just smaller than the covers, and glue in place. Once again, open and close covers, smoothing creases and wrinkles.
 Now it’s time to decide what you want to do with your matchboxes. I’m sending this book out as a deco for other artists to work in, so I simply taped the matchboxes in place as they were. However, if you’re keeping your book, you might want to paint your matchboxes and trays, and then glue them in place. Wrapping the boxes with a small piece of decorative paper looks nice, too. If you want the drawers to be easy to open, try poking two small holes in the end, and threading floss, twine or fibers through them. A flat bead or charm makes a nice pull, or just knot off the fibers and leave a tail. Fill drawers with fun things—photos, words, charms, you name it.
 For the 4 box book:
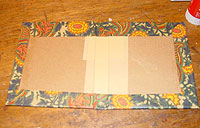
OK, it’s not really a book—it’s more like a four-sided drawer thingy. Whatever it is, it’s even easier to make. Like the earlier example, line up the matchboxes on a piece of cover board, and draw around the sides, leaving about 1/4 inch extra at the top and one side. True up the lines with a ruler, and cut two identical cover pieces from board.
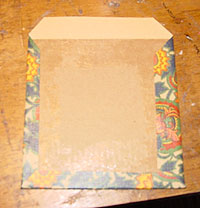 Cut two pieces of cover paper larger than the cover size. Leave a good 1 inch extra on each side so your covers will be clean finished after this step. As before, glue down the board to the cover paper with a liberal amount of glue stick. Miter corners, apply glue to both paper and cover board, and fold cover paper in. Let both covers dry.
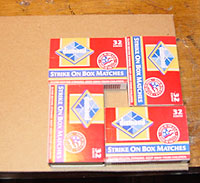
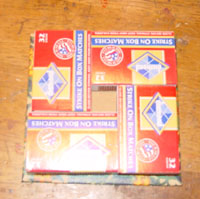 Since your matchboxes will be sandwiched between the two covers, there’s no reason to decorate the exterior of the boxes. However, one side of each box will show around the side of the finished book. If the pattern on the side of your matchbox bothers you, paint it or cover it now. I left mine alone for this book. Now is also a good time to remove the drawers and paint them, and to add pulls. For this style of book, a pull really isn’t optional—once the book is together, it’s almost impossible to get your fingers inside to pull a drawer open. Trust me, add some sort of pull! When you’re finished, glue the matchboxes in place, centering on the bottom cover.
 Glue top cover in place. Stack a couple of heavy books on top of it, and let it sit for a few hours until the glue is completely dry.


