I recently mentioned to another altered book artist that I was spending my evening preparing a book to be altered. Preparing a book? She’d never heard of someone doing that before, and asked me to explain exactly what I do to get my books ready to go.

Let’s talk a little bit about the books I choose. I’m fortunate to have a large number of Half Price Books stores in my area, including the mother ship in Dallas, which is the size of an average Wal-Mart. There are hundreds of thousands of used books in this one location alone. Given that many choices, I look for the following to narrow down my selections:
 First, the spine must be sewn rather than glued. This is a deal breaker for me—no matter how lovely the book might be, if the spine is glued, I put it back. I’m very hard on my books on my own, and since many of them must also endure being mailed to half a dozen other artists in round robins, I choose books that are built to take a beating. I haven’t had much luck with glued spines—I usually end up with pages popping out, and at the very worst, the entire spine giving up and splitting wide open. Not good.
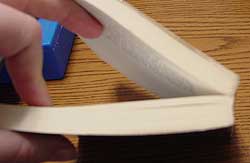
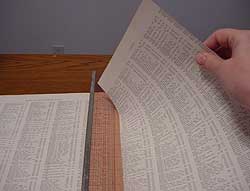
This is an example of a glued spine. (I pulled this one from my drawer of books destined to be torn up for text pages—it’s written in Italian.) Notice how the pages sit snuggly against the spine, rather than arching away from it when the book is opened? That’s one way to tell they’re glued. If I already own the book, I open it at the center, and bend the spine all the way backward. Generally, the pages split all the way back to the spine, and you can peel them out just like a notepad. Chances are, I’ll beat the heck out of this book. Best to choose another.
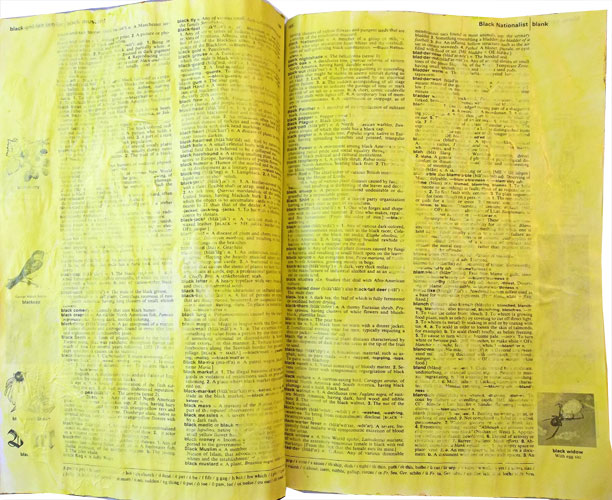
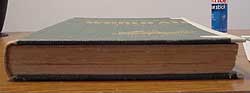
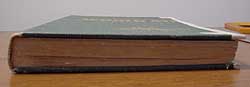
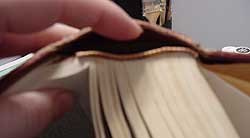 Now, here’s a stitched spine, on an old dictonary. See how it arches when opened? That’s good. Another check is to look along the tape for the scalloped shape of each signature—usually, if you can see that scallop, you can find the center of a signature, and see some stitching when you open it. If I own the book, I actually pull these center pages out to confirm that they are stitched in.
In choosing books, I go for older stuff. (By older, I mean books printed before I was born—before 1960.) New novels are my least favorite books, because they’re made from cheap paper, and are usually just glued together. Older books that were meant to last a long time, such as dictionaries or other reference books, are my favorites. You can beat the heck out of them, and they’ll still hold together.
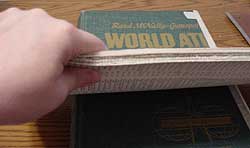
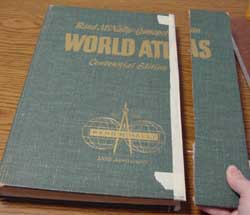 Here’s the book I chose for my upcoming project—an old atlas with a stitched spine, in reasonably good condition. I knew I wanted to cover the book with velvet, so the condition of the covers didn’t matter much. As you can see, I also wanted a tall, narrow book, and since I couldn’t find one, I cut this book to size. I won’t go into this process here, since it’s an article all by itself, but basically, I cut down the covers with a utility knife, and then cut the pages down slightly narrower. I’ve also done this on a miter saw with varying degrees of success, and with my jigsaw if the book is well clamped.
 Here’s what the end of the book looked like when I started. Same height from spine to page edges. Given the amount of bulk added each time a set of pages is altered, this book would be fat and unable to close if I sent it out this way. I know some people love fat books, but the spine really isn’t designed to accept the extra bulk. Altering puts a strain on even the toughest bindings, so I’m going to reduce the strain up front, before the book is sent out, by removing some pages.
 The easiest way to remove a page without weakening the binding is to tear it away, leaving a bit still bound into the book. I usually use a ruler—this one is my favorite metal-edge quilting ruler—positioned anywhere from 1/2″ to 1″ away from the fold. I vary the width on each page, so the reduction of pages makes the book taper rather than creating a hard change. I simply press down on the ruler and tear the page against it.
 This particular book is going to have a niche cut in the first half of it, so I removed 50% of the pages from the center of the book to the back cover. I usually do this in front of the TV, because it’s boring—tear a page, turn a page, tear a page, turn a page. On a big book like this, there’s a lot of tearing. This side view shows the reduction once I finished. The book now tapers, higher and the spine and lower at the page edges.
 How many pages did I remove? This many! This is 50% of the pages from the center of the book to the back cover. If I had not been doing a niche in the front section, I would have removed double this amount. These extra pages go into my text page file—they’ll make lovely background papers on some other project.
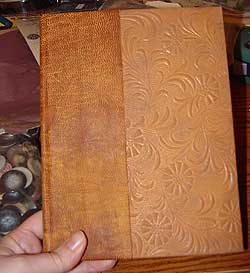 Here’s a book I prepared for another round robin, and ended up not using. This started out as an old Italian book, with a good stitched book block, but a cover that was deteriorating, and end papers and spine that were starting to come apart. I solved this problem by reinforcing both the spine and the end papers. Here, you can see the exterior of the book. Since I had to support the spine, and deal with covers that didn’t look so great, I chose to recover the entire book. The covers are done in a heavy embossed paper. To support the spine, I used a fairly heavy piece of soft leather. I glued this in place, and then clamped it over night. To tone the two and make them look like they belonged on the same book, I aged both the leather and the paper with some dye inks. There’s no sense having a lovely aged interior covered by a new-looking exterior, is there? That solved the exterior problem, but I still had end papers tearing away on the inside.
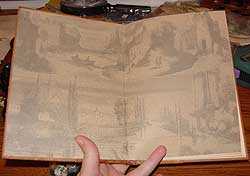 Since the recovering left raw edges on the inside of the book anyway, the new end papers served two purposes: they covered the edges, and also stabilized the book, keeping the book block from tearing away from the cover. I simply glued these papers to the inside of the old cover, and to the first page of the book block. Sometimes, this requires gluing the first couple of pages to the new end paper, to create a very stable, firm end. Other times, just gluing the new end papers over the old will work.
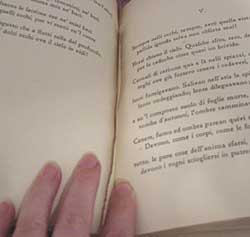 Here, you can see where I’ve torn away pages. As with my current book, I tore away 50% of the original pages to allow for the extra bulk altering will add. When this book is finally altered, I’ll just ignore these little stubs of paper, either gluing them down to the next page or covering them over, then working the pages as usual.
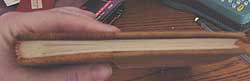 You can see how this book tapers from spine to outer edge. This book should withstand some serious altering without compromising the integrity of the spine.
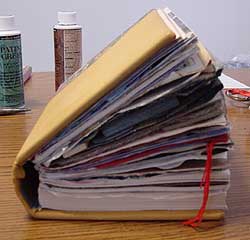 Why go through all the trouble of reducing pages? Here’s why. This is a book I sent out several years ago. Although the spine is stitched, I sent it out with no pages removed. The artists who worked in this book added a great deal of bulk to it without taking into account how their alterations were effecting the spine. Also, you’ll notice that they worked back to back pages, so while the front half of the book is altered, the back half is still blanks. As a result of poor planning and preparation on my part, the spine of this book is broken, and pages are tearing away. My own artwork, which is at the front of the book, has split along the spine, and the book cannot be repaired at this point without compromising the artwork on those pages. This book is now extremely fragile, and each time it’s handled, more pages begin to tear away from the spine. Sadly, the way we naturally pick up books of this size—by grabbing the outer edges of the covers and squeezing together to get a tight grip—causes the spine to weaken more each time the book is handled.
By removing pages, you distribute the extra bulk altering adds through more of the book, and reduce the stress on the spine. Be sure to do what you can before your books are altered to insure they have as long a life as possible once they’re complete.


