
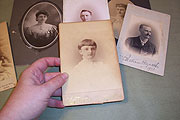
 What’s a cabinet card? Here are some examples. They’re old photographs taken late in the 19th century or early in the 20th, mounted on heavy board. They usually have some sort of embossed section on the board, indicating the name of the studio where the photo was taken. They’re called cabinet cards because they were designed to be propped up in cabinets for display, without any sort of framing.
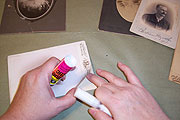
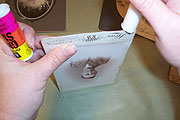
The cabinet cards I purchase for altering are often in pretty bad shape. My favorite antique stores often have cab cards that have been sitting in leaky attics for many years, so they’re usually a little mildewed or foxed. (Foxing is the brown speckled ageing seen on many poorly preserved paper collectibles.) They often start to separate into layers, so before I start altering, I usually do a good once over with a glue stick, gluing down large peeling areas, and also sealing around the whole outer edge for stability.
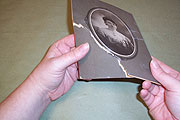
I had a couple of photos with broken boards. These need a little more than glue stick—they need to be bent back into shape, and glued with a thin layer of Tacky glue or Weldbond, then weighted while they dry. Cards with this much damage also need a little extra planning, since hiding the break may be necessary.
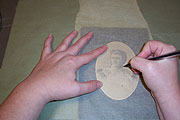
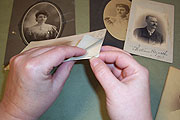
I like to work on the card section separately from the photo, so a little masking is in order. I use tracing paper to trace the shape of the area I want to mask, then cut the shape out.
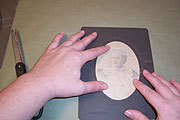
A little repositionable double-sided tape will hold the mask in place while I work. Even though the tape is designed to be easily removed, it can stick too well to delicate photos. I often run the side of the tape that will touch the photo against my clothing a few times, to pick up a bit of lint, and make it just a little less tacky.
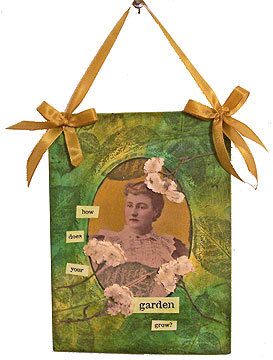
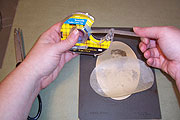
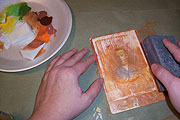
 Once the mask is in place, I can give the rest of the dark card a blotchy coat of gesso, applied with a sponge.
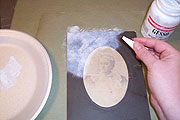
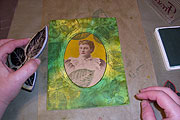
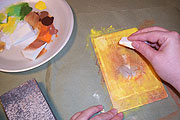
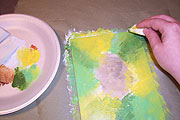 When the gesso is dry, a coat of color can be applied. I usually work with several base coat colors, each blended with just a bit of clear acrylic glaze to make it less opaque. Here, I’m working with yellow and two colors of green, from light to dark, overlapping colors a bit. When they’re all down, a quick blot over the whole thing with a sponge blends the colors just a little. Be sure to remove the mask before setting the painted card aside to dry.
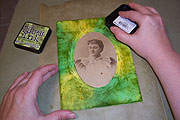 Next, I tone the whole background with a little ink. This card got a light coat of green Distress ink dragging over it, picking up the lumps and bumps of the card, as well as the embossed design around the photo. Any ink that sneaks onto the photo can usually be wiped away if the photo is glossy.
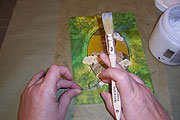
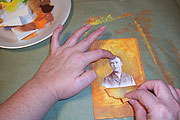
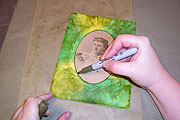 To give the painted area a nice finish, and frame the photo, I used a Sharpie to draw a wide line around the oval. Everything gets a good blast of heat from a heat gun to set it.
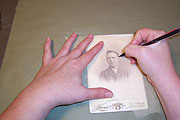
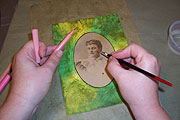 The photo can be tinted using water-based markers, and a brush. The marker can be applied directly to the photo, and then blended with a slightly wet brush. Try not to work one area for too long, because as the photo gets wet, it begins to absorb differently. Color, brush, and then move on—you can always let the photo dry completely, and then go back and recolor.
 I stamped onto the card and photo using some leaf stamps and chalk inkpads. Once again, the whole card gets a good blast from a heat gun to set the inks.
 I ornamented this card with some dried flowers. These can be tough to apply without dissolving or crumbling. My method is to apply a good swipe of matte medium, press the flower into it, and then pat a good coat of medium over the flower. Again, a place where you don’t want to overwork—get that flower down, cover it with medium, and then set it aside to dry completely.
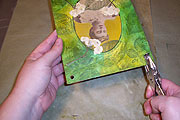 Since these cards will hang on the wall when finished, I punched holes on either side of the top edge with a hole punch, then threaded ribbon through and tied bows. The bows are anchored in place with a dab of Tacky glue to make sure they don’t untie when the card is hanging.
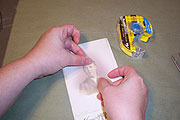
I started this second card the same way as the first—by masking off the figure with tracing paper held in place with a little repositionable tape.
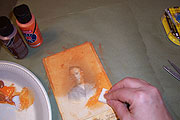
Since this card was more photo and less card, I approached it differently, to exploit the glossy surface. I skipped the gesso here, and just blotted on some orange acrylic thinned with a little glaze. I let this dry for a few minutes, then wiped the whole photo with a clean sponge, removing paint in areas where it was still a little damp. I let the photo dry, then dragged a sanding block over the painted areas, roughing it up and removing a little paint here and there.
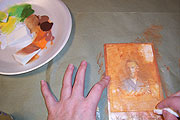
A little yellow glaze goes over the top of the roughed up surface. Now it’s good and blotchy, and the mask can be removed.
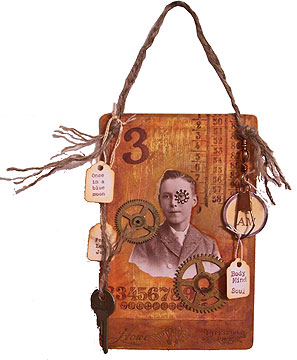
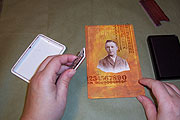 Over the dry glaze, I stamped with an assortment of number stamps and some brown ink. I heat set this immediately, to keep the brown dark, and the yellow-orange bright.
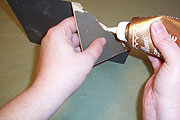
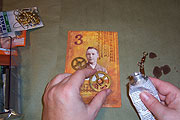 I glued some gears and washers to the card with E6000. Some were already old and aged, and some had to be toned down with a little alcohol ink before gluing.
 To clean up the edge of the painted area, and create a crisper glow around the figure, I drew a line around it with an orange Sharpie, then quickly blended the outer edge of it with a little alchol on a cotton swap. I gave the whole photo a good blast of clear spray sealer when it was dry.
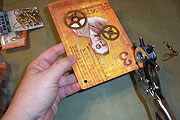 I punched holes in the top of the card, and tied some jute twine through them to create a hanging loop. Hanging from either side of the twine, I added some stamped tags and a few metal embellishments.


