
 I love using backgrounds in an altered book that allow the text on each page to show through. This background is really a no brainer: I simply dragged some chalk across the pages, and sealed it with a clear sealer.
The supplies you’ll need are pretty basic:
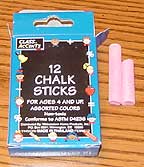 First, you need chalk. Now, there are plenty of high-priced chalks on the market that were developed for the scrapbooking industry. These chalks have varying amounts of pigment in them, and they tend to be either very soft or very brittle, which makes them difficult to drag. For this technique, try plain old chalk sticks from any dollar store. They usually come in packs of pastels and white.
Next, you’ll need a sealer. Chalk will rub off endlessly unless you anchor it to the page by sealing it. I have two sealers that I use regularly: Krylon Low Odor Clear Matte Finish, and Aussie Mega Styling Spray. The Krylon is an art materials sealer, but even though it’s low odor, it still stinks like crazy when applied. I generally have to take my piece out to the garage, spray it, and leave it there overnight—and even then, it’s still a little stinky when I bring it in to continue working. The Aussie spray is from the hairspray aisle of my local store. In the 80’s, I used this stuff to keep my stylishly big hair in place—a nuclear blast won’t get through it. Although this is not an art materials sealer, it works just as well for my purposes. It’s also stinky, but in a non-chemical, fruity sort of way. I can spray it onto my piece while it’s in my workroom, set it aside for a few minutes while it dries, and then continue working the page without passing out from the fumes. The down side is that whatever is sprayed with this will always smell a little fruity.
Last, you’ll need to protect your work surface. Working with chalk is messy. No matter how neat you are, the chalk will shed dust, and that dust will get everywhere. Throw down a sheet of newspaper, and as soon as you’re done chalking, wad it up and remove it from the area—don’t just toss it in the trash bucket at your feet, because if you toss in something heavy later, chalk dust will fly all over the room. (Don’t ask me how I know this…)
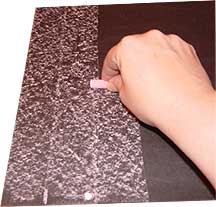 There’s not much to say about technique here: simply lay your chalk stick flat on your page, and drag it over the paper. The rougher your page, the more chalk you’ll lay down with each stroke. (I don’t recommend this for glossy pages—you can rub on them with chalk all day long, and still not have anything worthwhile.) I find that working with a half stick of chalk is best—somehow, if the stick is longer, I end up breaking it as I drag it.
In this example, I used a black background paper, to show the texture of the chalk. Overlapping your strokes will create a sort of striped effect, with heavier color where the strokes overlap. Smudging the chalk will create a sheer, soft background (and it also creates much more dust).
Once you have the background of your heart’s desire, seal the heck out of it. Spray the sealer of your choice over the page lightly and evenly, and DON’T PANIC when the chalk seems to disappear as it becomes damp with sealer. Don’t mess with it, and for goodness sake, don’t try to fix the color by adding more chalk at this point, because you’ll end up with messy chalk, and damaged pages. Simply set the damp pages aside and let them dry. The color will revert back to its original state as the excess sealer dries.
If you wish, you can work chalk over dry sealer—but be certain it’s completely dry! Seal again once you’re finished, or the second layer of chalk will smudge mercilessly.


