 I love making artist trading cards! They’re small and quick to make, even at their most complicated and intricate. I also really enjoy exchanging artwork with other artists—my current collection is getting close to 1000 cards, and each one is a treasure.
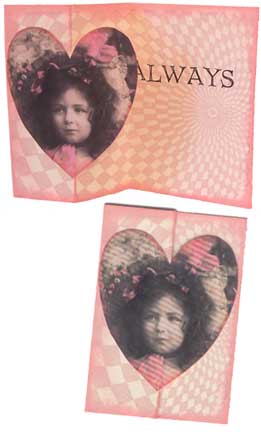
Sometimes, I want just a little more room than the standard ATC size allows. As with my altered books, my solution to this need for more space is simply to create a fold-out that will tuck a little extra room behind the front face of the card. This technique is extremely simple. As a plus, it absolutely requires viewers to pick your card up and handle it to get the full effect, so it’s a great ice-breaker at face to face exchanges.
To make a card like this one, you’ll need:
- Cardstock or heavy paper for the background
- A background stamp and inkpad
- A word stamp or other embellishments for interior
- Chalk inks for edging
- A heart pattern or punch
- Photos or images for the heart
- Adhesive
- Scissors and a paper trimmer
 First, we’ll cut the background for the card. I used a solid ivory cardstock, but any heavyweight paper will do. If you’d prefer to use a patterned paper and skip the stamping, your card will come out just as lovely.
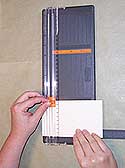
Cut a piece of your background paper 5 inches wide by 3-1/2 inches tall. I use a paper trimmer to cut my ATCs, because it gives me a cut that’s truly straight.
 If you’d like to stamp a background image, do it now, while the card is flat. Once it’s folded, it becomes a little more awkward to apply a really large stamp like this one. If you’re using patterned paper, you might still want to stamp over the top of it. Try it—you might like it!
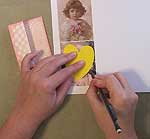
 Add some color along the edge of your card with some chalk inks. Just swipe the pad along the edge at an angle. If you use pads in ochres or browns, it makes great aging. For this card, I used pink, to cover up the fact that my background stamp didn’t quite make it all the way to the edges of my card.
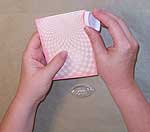
 After your inks have dried completely, fold the card in half, patterned side in. This will leave you with a card that’s 2-1/2″ wide by 3-1/2″ tall—so, your card is now the correct ATC size.
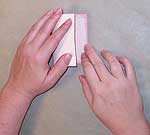
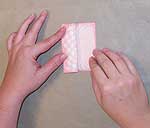 Fold the top layer of the card back, revealing your lovely patterned background. Make sure that you fold it exactly in half, so the card remains the right size.
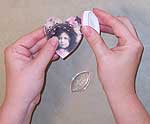
 Print out the photo for your heart shape. If you’re using a punch, flip it over on its back. slide the photo into the punch image side up, and you’ll be able to position your image as you wish in the heart shape before you punch—then, just push down. Don’t worry, your punch will work just fine upside down.
If you’re tracing the heart shape, and need a pattern, you’ll find one uploaded to the Files section of my newsletter group. You have to be a subscriber to access the Files. Print off the heart, cut it out, then trace it onto your photo and cut it out again.
 If you wish, edge your photo with some chalk inks. I like to do this with the same color I’ve used on the background, to tie the two pieces together.
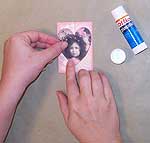 Glue the heart to the left side of the folded card. Be sure you only put glue on one half of the heart, otherwise you’ll stick your fold together. (Don’t ask me how I know to tell you this…)
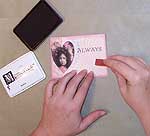 When your glue is dry, open the card and embellish it. I simply stamped a word, positioned so that when the card is closed, it’s hidden behind the heart. I sort of like the idea of hiding things inside, so they can only be seen when the card is open. It’s your card, so you decide how the interior should be decorated. Don’t forget to sign the back when you’re finished!


