 One of the girls brought some circles cut from holiday cards she’d received in previous years. We also had quite a large assortment of cardstock and paper scraps to play with, since we were meeting at The Paper Planet, our local paper junkie store. They donated all their leftovers from various projects so we could make cards for some local nursing homes.
Unfortunately, I left my camera at home, so I missed getting shots of the really lovely cards we created. However, I needed a few quick cards to attach to gifts this week, so I made some little ones using the same basic idea:
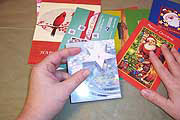 First, I assembled a pile of holiday cards. This part wasn’t easy for me, because most of the cards I receive are handmade, and I don’t think I’d feel good about cutting those up. I did find a few from folks like my realtor and my dentist, and I discovered that my local dollar store had boxes of a dozen assorted cards.
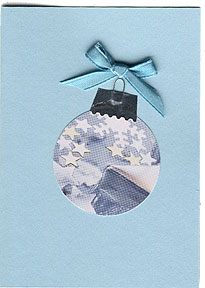
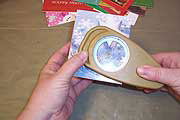 I used a big fat round punch on the cards. This one was about 1-1/4 inches, but I think the circles I used at The Paper Planet were 2 inchers. I always use my punches upside down, so I can see what the heck I’m punching. (Note to punch manufacturers: please make our lives easier and start manufacturing punches that let us see what we’re doing!) I simply lined up a pleasing image in the opening, and punched it out.
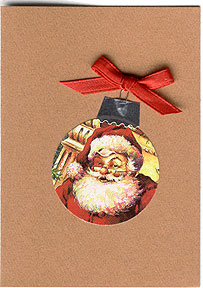
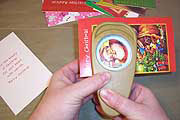 Some cards had very clear focal images on them, like this Santa. I centered those in the opening and punched them out, but I also punched out a few more circles from elsewhere on the card that simply created a nice texture.
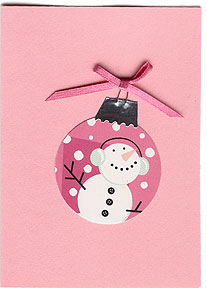
 This card had an all-over snowman design. I was able to punch half a dozen circles from this card, some with snowmen in them, and some with just the pink snowflake background.
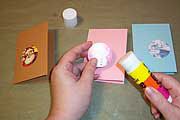 OK, on to the new cards. I had a mat stack of cardstock already cut in a convenient size, so all I had to do was choose a color and fold the cardstock in half. I glued one circle to the front of each card. For larger cards, I might have arranged three circles instead.
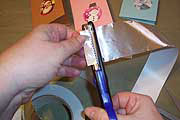 Next, I cut a strip of foil tape with straight scissors on one side, and scalloped scissors on the other.
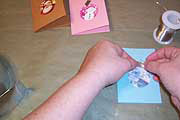 I cut a tiny piece of wire, folded it into a loop, and taped it to the top of the card with the foil tape to create the ornament top and hanger.
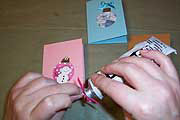 I tied a small bow from matching ribbon, and glued it to the top of the wire loop with a little E6000.
Here are two more examples of the simple cards I made at home:
These cards are fairly plain, since I’m using them with gifts. My plan is to stamp a message on them before attaching them to the gifts. Perhaps a little background stamping would be nice on larger cards, or some additional fun papers could be applied before the ornaments go on.
Go recycle some cards!


