Originally posted on March 10, 2004.
Revised on August 20, 2008.
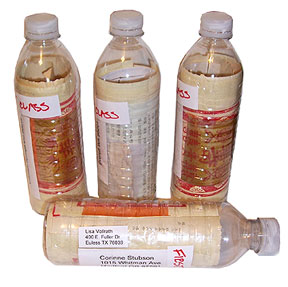
 In many online groups, mailings to test the post office are quite popular. People will mail all manner of unwrapped items to each other, just to see if the post office will send them through. In my first naked mail experience, I sent these plastic bottle mailgrams filled with altered art goodies to some folks on Alterations. I’m sorry to say that the clerk at my post office didn’t even blink when I started placing these bottles on the counter—a week earlier, a lady had come in with an armload of baby bottles she was mailing out as birth announcements. However, the guy in line next to me liked them so much, he flagged me down in the parking lot to ask what kind of bottles I used so he could go home and assemble some himself.
Here’s how I put them together:
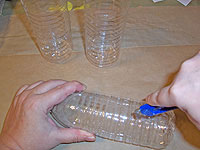 Start with a clean, dry plastic bottle. I used individual size water bottles that are clear, but any plastic drink bottle in any color will do. Lay the bottle on its side, and use a utility knife to make a lengthwise slit down the side of the bottle. Try to cut about as long as your address labels will be, or maybe a little shorter.
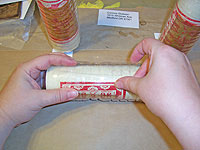
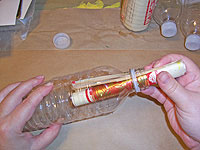 Since I was mailing to other artsy types, I filled mine with collage goodies. I started by gathering up a small pile of pretty papers and text pages. I rolled them up in a tube small enough to slide into the top of the bottle, making sure there was something pretty on the outside of the roll, since it will show through the bottle and create sort of a lining.
 The roll expanded inside the bottle. I persuaded the papers around so the start of the roll lined up with the slit in the bottle, using a popsicle stick.
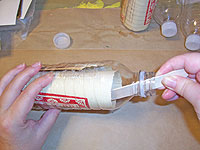
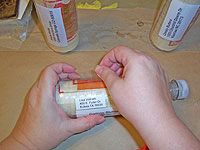
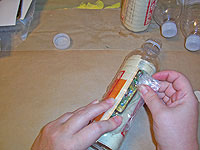 I wanted to include one piece of finished artwork—in this case, a domino pendant on a cord. I packaged the pendant in a small plastic bag, then slipped it through the slit, and inside the roll of papers, pushing as far as I could with my fingers.
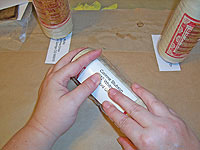
 I used the stick to move the plastic bag around to the center of the bottle. I continued adding items this way: a small envelope of cigar bands, some miniature playing cards, even an ATC. The ATC did have to bend just a little to fit inside the bottle.
 For a more recent project, I had to add things like notes and address labels to the inside of the bottle. I just added these through the top, rolling them up and angling them into empty spaces inside the bottle.
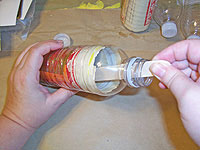
 Small items like beads, sequins, rhinestones, brads and clips can go in last. It’s nice to add smaller items that are loose, so the bottle rattles.
 When the bottle was full, I glued the top shut with a little EcoGlue, which is pretty much a permanent sort of closure. I’ve done these in the past without glue, and just applied a strip of metal tape around the cap to hold it in transit, and they always stayed on just fine.
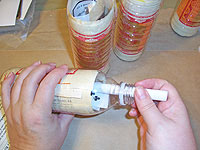
 To seal the slit in the bottle, I started by covering it with a strip of clear tape.
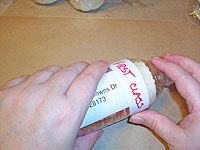
 I covered up the taped slit with an address label, and another strip of packing tape.
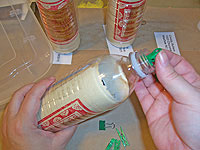
 I applied a small return address label with a strip of tape wrapping all the way around the bottle.
 The nice lady at the post office really wanted to stamp my first set of bottles First Class, but the tape resisted the ink. I went ahead and wrote First Class in red Sharpie, and taped it onto the bottle. Maybe it’s time for me to just get a First Class rubber stamp…


