 My birthday is next week, and I’ve learned to ask for cards and mail art if I want any sort of celebration. I posted a note in my blog asking for a little postal love, and one of the packages that arrived early contained a handful of tiny square collages, and a note telling me to give them a try. I’m never one to pass up a challenge, so I decided to dive right in.
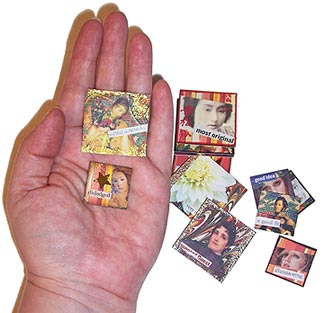
The pieces I received were all 1″ squares, which I initially thought was just too insanely small to even consider. Even though I used to do dollhouse miniatures, and have plenty of experience creating art so small it’s almost impossible to see, I just didn’t think I could go that small. I started with 1-1/2″ squares. That extra half inch in each direction makes a huge difference! I worked my way down to one inch squares, which were small, but actually a lot of fun. Here’s how I did the handful you see here:
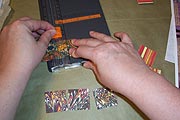
 First, I sifted through my ridiculously large scrap pile, looking for interesting small pieces of background papers. I also pulled out some light colored solid cardstock scraps to use as bases.
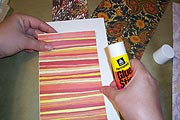 I glued the pieces of background paper to the solid cardstock using a glue stick. I contemplated doing a little stamping on the uncut backgrounds, but never got around to it. Next time, maybe.
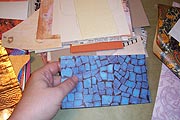
 Next, I used a paper trimmer to cut strips. I cut more in 1-1/2″ strips than 1″, and tossed them into piles sorted by size.
 Next, I cut the bases into squares. The paper trimmer helped me keep them square and straight, things I find impossible to achieve with scissors or a craft knife.
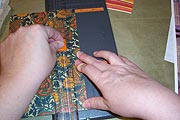
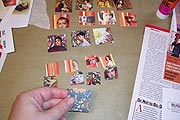 OK, now it’s time to decorate. I was in a face sort of mood, so I clipped faces from the scrap pile. Some were from faux postage sheets, some from image collection prints, and some were from magazines and catalogs. I cut myself a pile of faces and face parts, then glued, doing a sort of assembly line. It’s really easy to get a whole bunch of these going at once.
 I’m in a phase where everything I do has to have a word on it. For pieces this small, I needed really tiny words. The text from articles in Time magazine seemed exactly the right size. These were cut one at a time, and glued down quickly, because the ceiling fan above my work table tends to blow little loose pieces away as soon as I put them down.
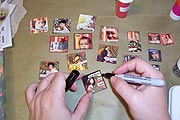 I tried different types of edge treatments. I patted some edges with embossing ink, and then dipped them in embossing powder. That was a little too thick and crunchy for such tiny artwork. I edged some with chalk inks, and others with just a hand drawn line. I originally tried this with just plain old waterbased pens, but some of my magazine images repelled the ink, so I switched to Sharpies, which gave a nice, bold edge. I patted a few squares with a bit of glitter glue, and glued small star-shaped confetti on others. It was quite a challenge to find things small enough to decorate the pieces.
Surprisingly, I enjoyed making these squares very much. In some ways, they were very much like gluebooks, requiring little in materials or thought. I just cut and glued, and in about half an hour, I had two dozen squares of each size.
Now what? I think these might be very swappable. They’re small enough to make quickly and mail for minimal cost. They’d look great glued down as a grid on a canvas or a piece of cardstock. Maybe a quick swipe of sealer and a pin back, and they can be tiny art pins. What would you do with them?


