
The Joys of Rusted Paper
I have a special place in my heart for rusty things. Several years ago, I was the recipient of a few sheets of rusted paper, made by a friend, using old sewing patterns. I rationed that lovely, rusty paper carefully, but when it finally ran out, I had to figure out how to make my own.
Making rusted paper is the sort of thing you want to do without any expectations. What you create depends on the amount of rust on your plates, the heat and humidity of your location, the minerals in your water, and the type and weight of your papers. Even if you duplicate all those things the next time you work, your results will be completely different. With little exception, the results will almost always be lovely and very usable, regardless of whether they’re what you expected. I learned very quickly to just fall in love with the oddities I created, or put them into the pile for another pass through the process.
A Few Words About Safety
- Always do your rusting far away from any metal items you want to keep intact. For example, I don’t rust in my tiny one-car garage, because I store garden and power tools there, all of which I’d prefer not to rust. If possible, work outside, on a piece of wood or cardboard covered with plastic.
- Although the liquids I recommend using are not toxic, try not to breathe them in when spraying. A mask and some safety goggles would be wise if you’re using them for prolonged periods. Vinegar mist in your eyes is not pleasant!
When working with rusty items, especially rusting plates, it’s best to wear gloves. I always forget this part until my hands are aching and stained. - Do not rinse rusty items in your kitchen or bathroom sink! This is particularly important if you have a stainless steel sink or fixtures. Use a hose and a bucket or plastic tub, and pour the rust off in a dead spot in your garden, away from your house. I have a corner of my yard where I pile dead leaves and decaying branches—the rust water goes over there.
- Store rusted items completely dry, in a plastic bag. This includes both your finished papers, and the rusty items you used to make them.
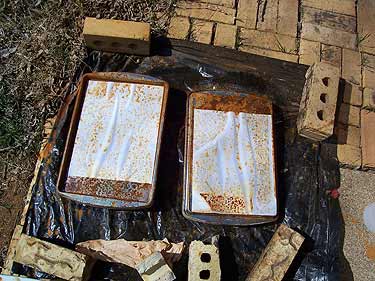
Rusted Paper Examples
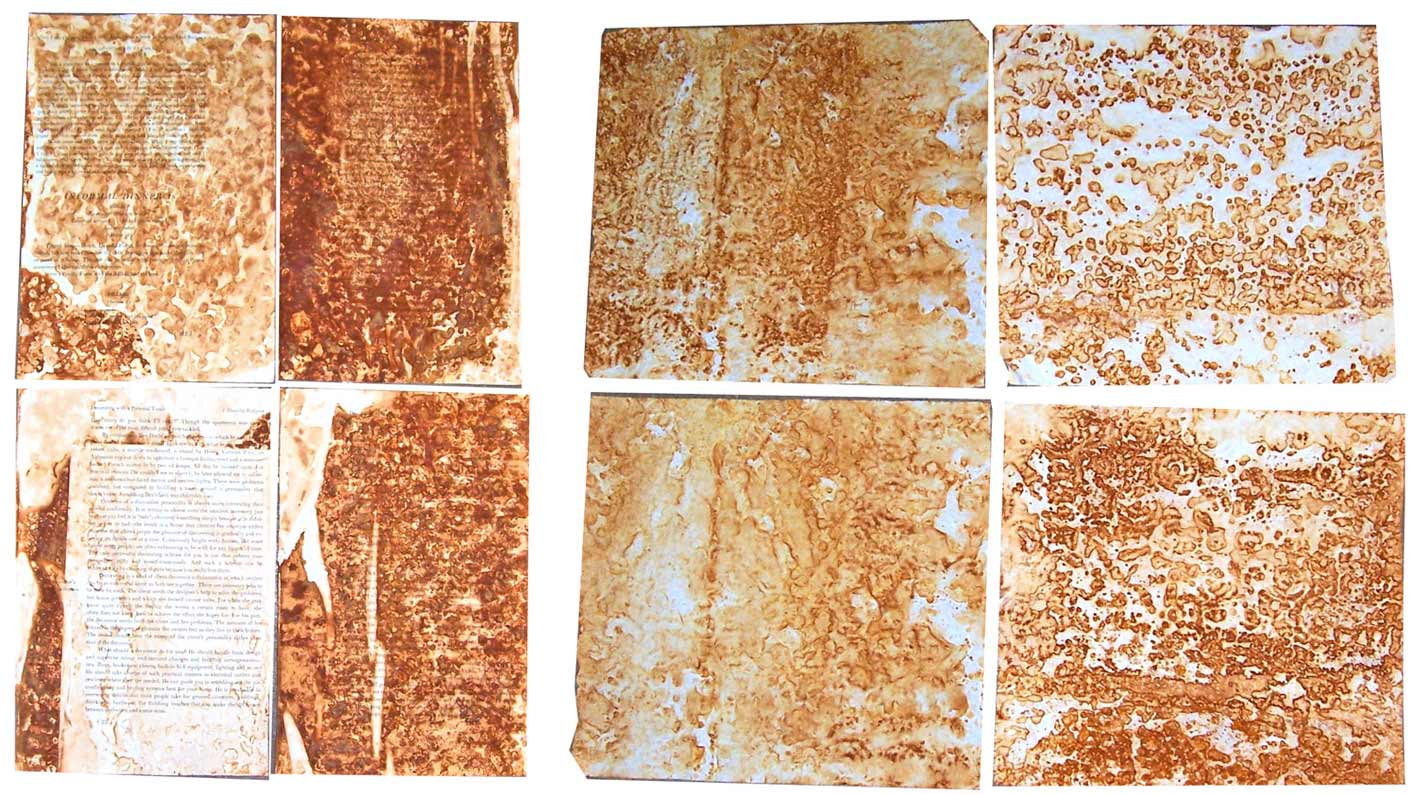
Above left, heavy book pages. These rusted really well, and because they had a high cotton content, they didn’t ripple much when wet, which shows in the finished sheets.
Above right, my all time favorite papers for rusting: Bounty paper towels. They’re two-ply, heavy paper towels that don’t tear when they get wet. They absorb water well, and dry flat. They rusted like a dream. As a bonus, since they’re two-ply, they can be separated when dry to form two sheets that are very similar.
Materials For Rusting Paper
To make your own rusted papers, you’ll need:
- Rusting plates. Please read my article, How To Make Rusting Plates, for step-by-step instructions on making your own rusting plates.
- Paper. Throughout this article, I’ve included some examples of the various papers I’ve rusted. I’ve had good luck with pages torn from books, paper towels, and old sewing patterns. Your mileage may vary, so get yourself a stack of assorted papers to start with, and see what happens.
- Water in a spray bottle. While you can do this with vinegar or peroxide, I opt to work with water to eliminate the smell in the finished papers. If you can live with the scent of old, rusty vinegar in your pieces, go for it.
- A place to dry finished papers. I use cheap painter’s paper and my garage floor for this, because it’s flat and not windy. That means I can dry things without weighting them down, which may cause ripples or puddles in the texture.
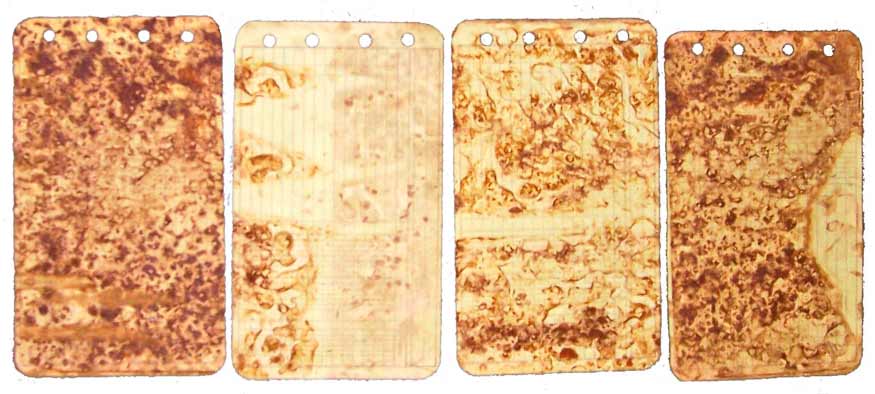
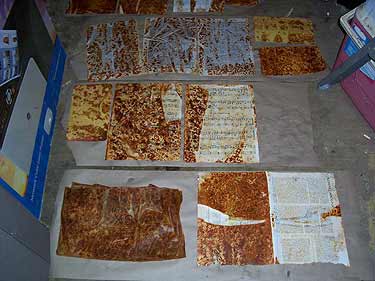
Rusted Ledger Sheets
Above, four little ledger sheets. I sort of tossed all four onto one plate, not layering them very gracefully. The one on the left was the one laying flat against the plate, and the one to the right of it was the one furthest from it. As you can see here, rust doesn’t really bleed upward very effectively. Contact with the plate is required for a good rusty coating.
Rusted Paper Instructions
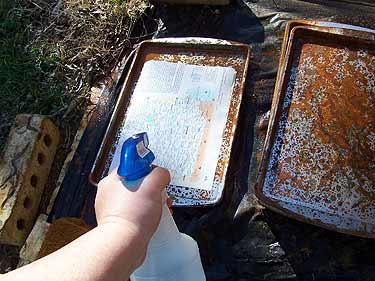 Mist a rust plate with water, or dip it into a tub of water to get it wet. Place a sheet of paper on the wet plate, and mist it all over.
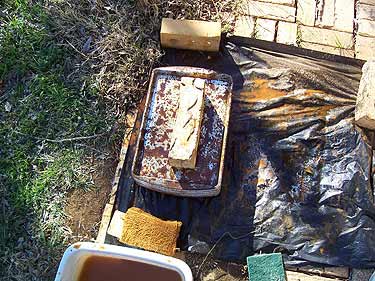 Mist or dip a second pate, and place it over the paper. Keep layering paper and wet plates. Set in a warm, sunny spot for a few hours. I weighted mine with a brick because it was windy.
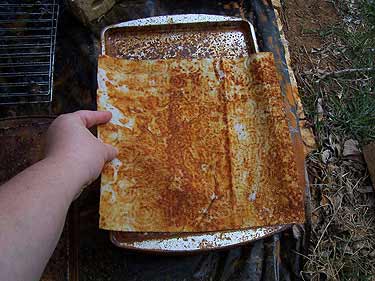
 In a few hours, check the progress of the rusty papers. Usually, the side that’s laying on the plate will be very rusty, while the reverse is only lightly rusted. That’s good. It gives you two different looks from one sheet of paper.
 If you think your paper needs more rust, mist it again, and stack the plates together. Leave it alone for a few hours, or overnight if you want a lot of rust.
 Gently lift the finished papers from the plates. Really soft papers may be fragile, so go slowly. If the paper is very dry, it may stick to the plate. You can give it one blast of the mister, and let it sit for a moment to loosen it.
 Let the papers dry completely. I leave mine on dry paper on the garage floor overnight. DO NOT use an iron to dry these papers, because they will cause the iron to rust.
 Applying Rusted Paper
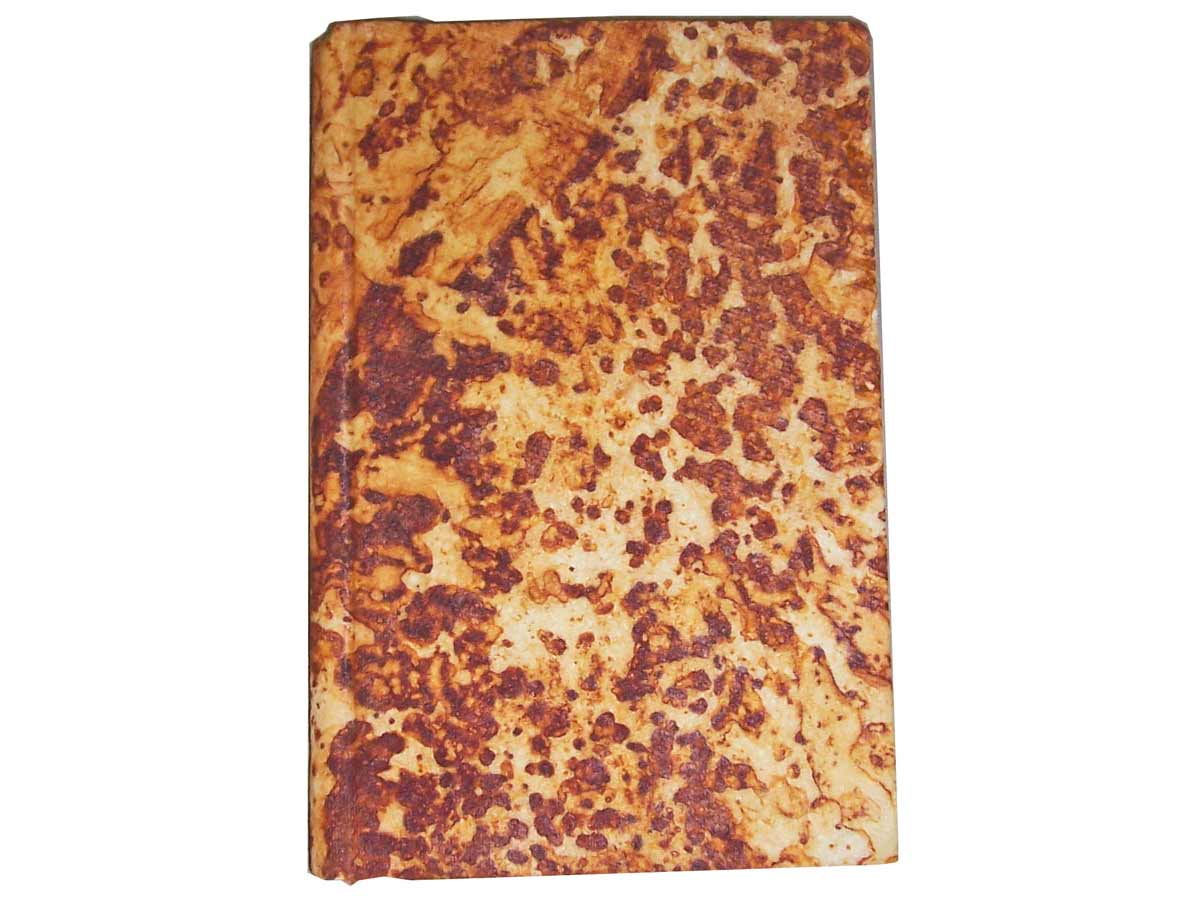
Although rusted paper is fairly stable once its dry, I think it’s best to plan on sealing it somehow before putting it to use in finished pieces. You can spray it with matte sealer, or you can use matte medium to apply it, and seal it to a piece. That’s the way I covered the book shown here with rusted Bounty paper towels.
Materials For Applying Rusted Paper
To cover a book with rusted papers, you’ll need:
- Rusted papers. I like to use papers that are fairly lightweight when covering books, to preserve the original line, shape and appearance. Try regular bond, mulberry paper, or the poor woman’s version, Bounty paper towels, which is what I used.
- Matte medium and a brush. I prefer matte to gloss when sealing rusted papers, because rust in its natural state is almost always matte rather than glossy.
- A book. I chose one with a sewn spine and a light colored cover. If your book has a dark cover, a coat of gesso will help keep it from showing through your lightweight papers.
Instructions
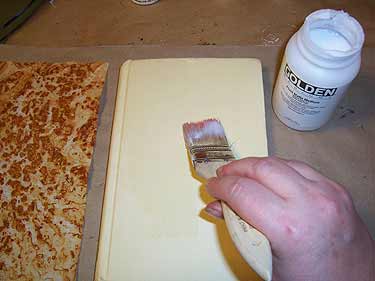 Apply a light, even coat of matte medium to the front cover and spine of the book.
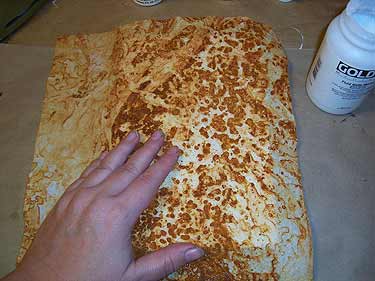 Cover the wet areas with a rusty paper towel, allowing some to hang over the three sides. Handle the paper as little as possible. Just place it down, press it into the medium, and leave it be.
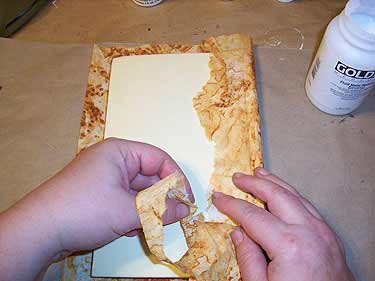 Wrap the paper towel around the spine to the back side of the book. tear away a bit on the straight edge to create a soft, blendable edge.
 Apply matte medium to the back side of the book, and press the torn edge into it. Gently apply some medium to the torn edge. Press another piece of paper towel over it to complete the cover.
 When the medium is dry, trim around the edges of the book, leaving about an inch of extra paper towel. Clip the corners on a diagonal, and clip to create a tab at the spine.
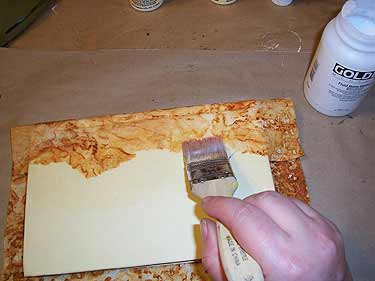
 Apply matte medium along the inside edges of the cover, and press the extra paper towel into it.
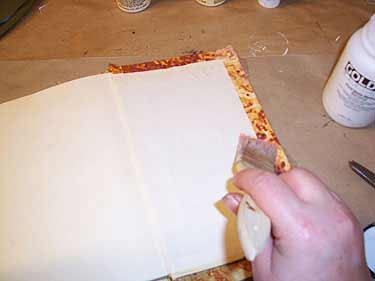 Gently apply matte medium over the edge to hold it in place, and seal the surface.
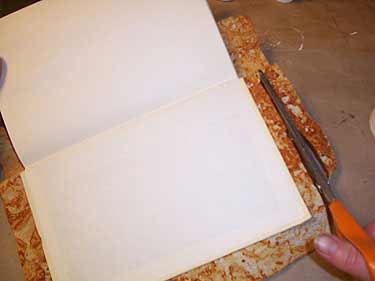
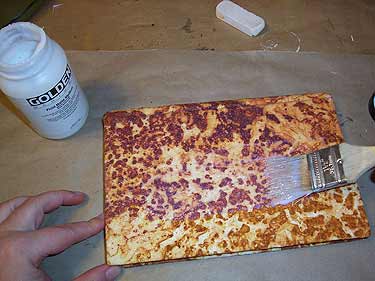 When the inside edges are dry, seal the outside of the book with a coat of medium. Apply a coat using long, single strokes, trying not to work over an area that’s already wet.
This article originally appeared in the March 2009 issue of The Monthly Muse.


