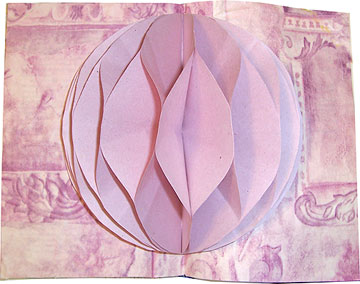
 This week, I worked in Angela’s altered book. Her theme is circles, and for some reason, I felt the need to do a big pop-up made of circles. This looks really hard, but it’s actually pretty simple to make. Here’s how it went together:
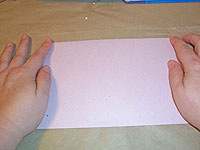
First, you’ll need ten pieces of lightweight paper. I did mine with plain old bond paper in a light lavender, and it came out pretty bulky at the spine. Wrapping paper or origami paper might be good to keep the bulk down.
 We’ll start with some endless folding. Fold one piece of paper in half.
 Fold it in half again to quarter it.
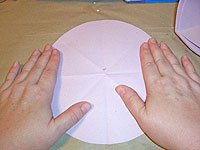
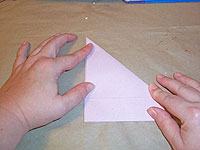 Now fold one side up to the other. This will create eighths radiating out from the center point.
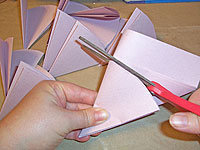
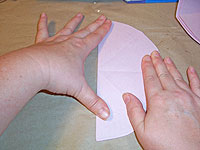
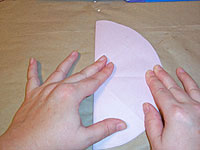
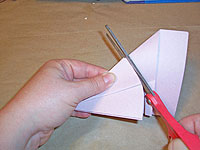 Cut to create a circle. I like to cut half, then fold one layer over to the other side to use as a guide, which makes my cutting somewhat symmetrical.
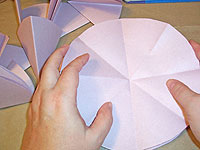
 Open up the circle, and smooth out any pointy spots, then refold it and even it up.
 Use the first folded piece as a cutting guide for the remaining nine sheets. Fold them into radiating eighths, and turn them into circles.
 Unfold all ten circles, and stack them so the first long, center folds are nested into each other. This will save you fumbling around later.
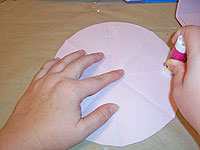
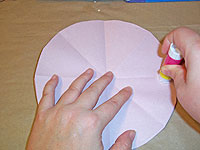
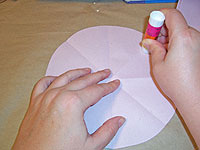 Now we’re going to glue. Using a glue stick, you’re going to apply a big, wet dot of glue on alternating folds. Wait, this is kind of confusing—here’s a gluing guide:.
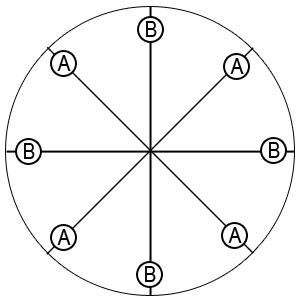 On the first circle, you’re going to apply dots on all the A folds.
 Put the second circle on top of the first, lining up the center fold, and press down.
 On this layer, you’re going to apply glue dots to all the B folds.
 Apply a third circle, and press down, then fold the circles in half on their center lines. This will help the closed pop-up lay a little flatter.
Keep layering circles, matching center folds, and alternating glue dot placement. Remember to fold in half after applying each circle.
 OK, here’s the last circle. If you started with A dots, you should be ending with B. On this last circle, you’re just going to apply glue dots to the two side B folds.
 Fold the circles in half and press down. This will glue the final circle’s two sides together to close the pop-up and turn it into a half-ball shape.
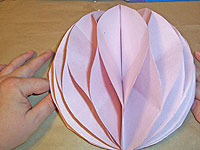 After a few minutes, gently open the pop up. I checked to make sure that all my glue dots held—and any that didn’t were reglued more heavily. I also checked to make sure that nothing that was sticking where it shouldn’t be. A couple of the circles had to be gently persuaded to open properly.
Close the circles up and weight them. Let them dry completely before you proceed.
If you wish, use a heavy pair of scissors to even up the circles, which might not be perfectly aligned after folding and gluing.
To apply into a book, glue several pages together to support the pop-up. Apply glue heavily to the back side of the first circle, and press it in place in the spine of the book. Close the book immediately so the wet glue will allow the pop-up to slide into place. Open to check that everyting is where you want it, then close the book and let the glue dry completely.


